6 Cheap Things You Need to Build a Great Home Gym

I work with many clients who train exclusively at home. One of these clients – who hadn’t exercised regularly in years – made fairly steady initial progress using only his bodyweight.

Eventually, however, he hit a plateau and became frustrated. His progress slowed and he was getting bored with the limited exercises he could do.

Since joining a gym wasn’t an option for this client, I suggested he upgrade his home workout set-up with a set of bands and PowerBlocks.

Within a few weeks, he felt stronger and was noticing renewed changes in his body. He loved being able to push himself more and enjoyed the new exercises he could now perform.

Making a small investment in home exercise equipment put the spark back in my client’s training and helped him get out of a rut.

For most people who train at home, there comes a time when bodyweight exercises are no longer challenging and/or interesting. If you find yourself getting bored with your at-home workouts or dissatisfied with your progress, it may be time to upgrade your home gym.

The good news is you can do this at fairly low cost with minimal equipment. Continue reading to learn my top 6 equipment recommendations for at-home trainees.

Bands

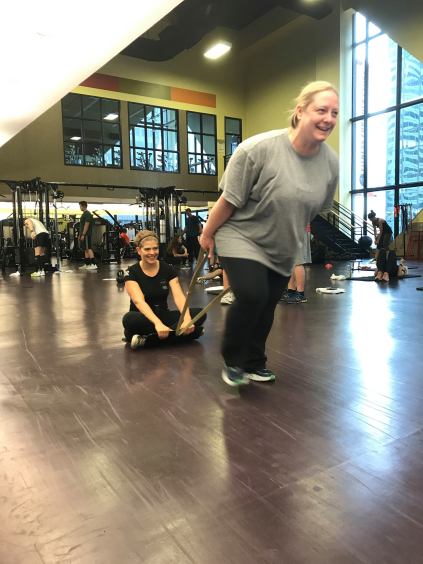
Bands are the first piece of equipment I recommend for all my at-home clients. They’re cheap, lightweight, and easy to store and transport. With a bit of creativity, you can train every muscle in your body using bands.

You can purchase different types of bands including small and large circular bands as well as longer straight bands with handles. Some band sets come with a door mount mount and a strap to attach the band to your ankle so you can target your hips and glutes.

I recommend purchasing a set of bands of varying resistance levels. You will need different thicknesses to effectively train different muscles and movements, especially if bands are the only piece of equipment you have.

The one downside to bands is that by themselves, they may not be sufficiently challenging for stronger trainees. Some movements are also more awkward to load with bands than other types of resistance.

Sliders

Sliders are placed beneath your hands or feet to add resistance to lunges, pushups, leg curls, and core exercises. Although you can order sliders designed for fitness, cheap furniture sliders purchased from a hardware store are just as effective. You may need to buy different kinds of sliders depending on the flooring in your home.

Ross Enamait introduced me to the incredible possibilities of slider training. Watch these videos for ideas on what you can do with sliders. (Note – Ross is also a great guy to check out if you’re interested in building more DIY home gym equipment.)

Door chin-up rig

If you want to get better at chin ups, you have to spend lots of time practicing. Purchasing a door chin-up rig helps you bump up your chin-up volume.

Door rigs can be a single bar or have multiple grip options. Most can be easily removed and stored when not in use. Some rigs can also be used for pushups, modified dips, and other exercises when placed on the floor.

A word of caution – before you buy a door rig, make sure your door frames can support it. Some doorways are too wide or don’t have stable frames. I learned this the hard way when I came crashing down out of an old door frame that couldn’t handle the strain of a chin-up rig. Learn from my mistake and always be careful when hanging or mounting equipment in your apartment or house.

Suspension trainer

A suspension trainer is another effective, minimalist option to train your entire body. TRX is the most well known brand, but there are other, cheaper options which work just as well.

To use a suspension trainer at home, you need a way to mount it on a door, wall, or ceiling. Again, be careful and make sure you can do this safely before investing in the equipment.

Powerblocks

If you really want to level up your home gym setup, you need to invest in weights. Powerblocks are a great option for people used to training with dumbbells or barbells. These adjustable dumbbells allow you to change the weight by adding or removing small plates. You can purchase weights with the potential to be as heavy as 125lbs. Powerblocks take up very little space and essentially replace an entire rack of dumbbells with only two weights.

Powerblocks are the most expensive recommendation on my list, and I wouldn’t recommend purchasing them unless you’re serious about training at home. However, you do get a great value with this purchase. Powerblocks are made well and will certainly last a long time.  

Kettlebells

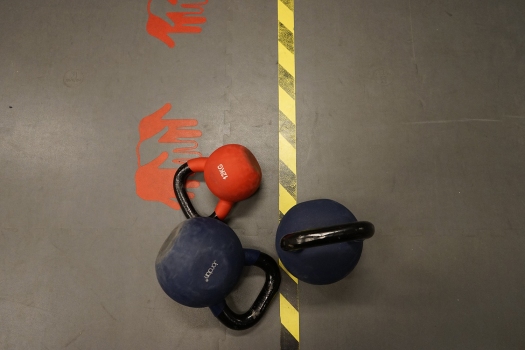
My final recommendation for your minimal at-home gym is kettlebells. Kettlebells are weights with the load placed beneath the grip, as opposed to on the side like with dumbbells. Kettlebell training has become popular in the last few years thanks to the rise of crossfit and “functional” fitness. You can train every muscle in your body weight a kettlebell and perform certain ballistic and power movements with you can’t do with other types of weights.

The biggest advantage to kettlebells is that you can get away with purchasing just one. This makes kettlebells more cost-effective than other times of weights. I have one 16kg kettlebell at my apartment and I can use it to train every muscle in my body.

However, some people may find your one kettlebell is too heavy for certain movements and too light for others. In that case, I do recommend grabbing a few kettlebells in different sizes so you can have more effective and appropriate training.

Kettlebell training can be more complex than other styles of lifting. You should seek out a qualified coach or take a class to learn the basics. If this is impossible, StrongFirst and Dragon Door are two great places to do some research or seek out instructional materials.

If you’re looking to improve your at-home workouts, purchasing a few small pieces of equipment can be a game changer.

Start with small equipment like bands and sliders.

If you can, hook up a TRX or door chin-up rig.

Finally, if you’re serious about getting stronger or building muscle, invest in some weights that make sense for your setup such as Powerblocks or kettlebells.

Like my client found, this may be exactly the change you need to see renewed progress and start loving your workouts again.

If you’re interested in putting together a fun and effective at-home training program, please apply for my online training program here.
Limited Funds? You Can Still Get in Great Shape

People mistakenly believe they can’t eat healthy or train hard because they’re on a tight budget. They see expensive gyms and depressingly high grocery bills and feel frustrated, overwhelmed, and defeated. If you’re trying to get in shape for the first time, it can feel like you need a ton of extra cash to pay for the things you think you need to do.

The good news is you actually don’t need a lot of money to eat healthy or work out. Keep reading for some of my favorite strategies to save while chasing your fitness goals.

Affordable healthy eating

The best way to save money while eating healthier is to cook your own food. I love eating out, but restaurant meals rapidly add up in cost and calories. Learning to plan, shop, and prepare most of your meals at home is an invaluable skill and money-saver.

Many people complain about the cost of buying fresh produce and protein. And it’s true that if you shop at fancy organic stores like Whole Foods, you will spend tons of money each week. One of the easiest ways to reduce your grocery bill is to change where you shop.

For years, I have done 95% of my grocery shopping at local international and ethnic food markets. The average cost of both produce and protein is significantly cheaper across the board at these stores. I also find the overall quality of the food I buy at these markets is much better than what I find at standard grocery stores like Jewel, Safeway, or Hy-Vee. My boyfriend and I save thousands of dollars each year doing our shopping at international markets as opposed to some of the more expensive standard grocery stores.

Note – If you live in the Chicagoland area I HIGHLY recommend shopping at one of the numerous Cermak Markets or Fresh Farms International Markets located in the city and suburbs. Those have been my two stores of choice for many years.

You can also reduce your grocery bill by changing what you buy. Start by selecting different kinds of protein. The most popular meats at the store – boneless skinless chicken breast and steaks – are also the most expensive. Choosing less common cuts of meat can save some cash. Here are a few ideas:

  • Choose bone-in cuts over their boneless counterparts
  • Fattier cuts will generally be cheaper than learner meats.
  • Buy large cuts. For example, a big pork shoulder roast is cheap and produces many meals worth of meat. Whole chickens are another delicious way to get more value from your purchase
  • Organ meats such as liver, kidney, tongue, and heart are usually cheap. These underrated cuts of meat are chock-full of nutrients for more adventurous eaters.
  • Eggs and other dairy products (if you tolerate them) are a cheap, healthy source of protein for meat eaters and vegetarians alike
  • For vegetarians, buying dry beans and lentils is extremely cheap. You can cook large quantities of these at once and freeze leftovers for later.
  • Consider buying a bulk protein powder supplement to fill in any gaps in your protein intake.

Finally, if you are very tight on funds, prioritize staples like rice, beans, canned vegetables, pasta, olive oil, and potatoes. These foods contain a surprising amount of nutritional value at a very low cost. In addition, buying your food in bulk can often (but not always) save extra money.

Training for cheap

Expensive gyms with fancy amenities and facilities aren’t necessary to get in great shape. Most cities have a number of discount gyms that offer $10-20 monthly memberships. Although these gyms have more limited equipment and space, they usually contain everything most people need to reach their goals.

If your goal involves getting really strong or jacked, you may need to look for gyms with a wider range of equipment (namely barbells, which most discount gyms don’t have). Take the time to shop around for gyms offering what you need at a reasonable rate. Neighborhood gyms often charge a lot less than larger chains. I trained for years at a small, hardcore basement gym that offered a steep discount rate for young people. I loved the vibe of this gym and did some of my best training there.

Depending on your location and financial situation, joining a gym may be out of the question entirely. The good news is you can train effectively at home or outside with a bit of planning. Check out my article about training on the road for some ideas to structure bodyweight workouts. You can invest in some low-cost equipment like bands, sliders, a kettlebell or two, a door chin-up bar, or powerblocks to dramatically expand your potential at-home exercise options.

If you want to get faster results and avoid the risk of injury, hiring a personal trainer is a great choice. However, training is a luxury often out of reach. Luckily, the internet is full of amazing free or low-cost training programs and other helpful resources. I relied on many of these programs when I was first getting into training as a poor college student. You can buy a really great program for under $100 and most are much cheaper. Make sure you choose a program that is appropriate for your goals, skill level, and equipment. Follow the program as closely as you can for its entire duration to see best results.

Note – Although there is tons of great info out there, the internet is also filled with lots of BS fitness advice. I pride myself on being a great researcher and finding the best of the best in any field I’m passionate about. Please reach out to me here if you want me to direct you to the expert(s) or program(s) I think would be most helpful for your goals and situation.

Getting in shape doesn’t have to be expensive. With a bit of creativity, research, and planning, you can look and feel great without breaking the bank.

If you’re interested in receiving more tips, tools, and strategies to get into your best shape ever despite a crazy schedule or other limitations, please sign up for my email newsletter here.


Awesome Gym Tool You Should Use: TRX

My sister is about to embark on a two-year stint living and working abroad. She knows she likely won’t have easy access to a gym and asked me what equipment I recommend to get the most bang for her buck while training at home. This was an easy question for me to answer.

If you are looking for a lightweight, portable piece of gym equipment you can use to train your entire body, look no further than the TRX.

The TRX is a suspension trainer which allows you to use your own bodyweight as resistance on a wide variety of exercises. You can train anywhere as long as you are able to hook up the TRX.

Keep reading for videos and instructions for my top-5 favorite TRX exercises. These can be combined to create a challenging full-body workout at your local gym or halfway around the world.

Inverted row

The TRX inverted row is one of my all-time favorite exercises. I use inverted rows with all of my clients who have access to a TRX. Inverted rows teach you to control your entire body and are easily scalable for different ability levels. They are also great for building strong backs, arms, and shoulders.

To set up for an inverted row grab the TRX handles and remove all tension in the straps. Your arms should be even with your sides with elbows forming a 90 degree angle. Maintain your plank position (straight line from ears to heels) and walk your feet forward until your body is at an angle.

Initiate the movement by lowering your whole body as one unit until your arms are fully extended. Complete the rep by pulling your body back to the starting position. Do not drive your elbows so far back that your shoulder dips forward. You should finish with your elbows at 90 degrees and your upper arms even with your sides. Don’t allow your hips to move or your shoulders to shrug up toward your ears at any point during the rep.

You can make inverted rows more challenging by using a steeper body angle (i.e., moving your feet farther forward). You can also elevate your feet on a box or add external resistance such as chains or a weighted vest.

Pushup

Performing pushups using a TRX is a great way to challenge your core and shoulder stability. Because of the unstable nature of the TRX,  be sure you have good control while doing a  pushup before attempting this variation.

Set up for TRX pushups by getting up on your toes in pushup position. Your feet will be on the floor and your arms will be fully extended beneath you with your hands on the TRX handles. The rest of your body should form a plank with a straight line from ears to heels. Position your hands at 2 and 10 o’clock.

As you lower yourself into the bottom of the pushup, your shoulder blades should move together toward your spine. Aim to keep your hands directly beneath your elbows and your shoulders down away from your ears. When you push yourself back up, reach your arms away from you. The shoulder blades should pull apart at the top. Be sure to maintain a solid plank position as you complete the entire rep. You should not excessively arch your back or stick your butt up to the ceiling.

Like the rows, pushups can be made more challenging by elevating your feet or adding external resistance.

Leg curl

TRX Leg curls are a great way to build strength in your posterior chain (glutes and hamstrings) and core.

Set up for leg curls by lying on your back with your heels in the TRX handles. Initiate the movement by squeezing your butt to raise your hips into a bridge position. Next, curl your heels back toward your body before returning to a legs straight position. If staying in the bridge for the entirety of the set is too challenging, rest on the ground in between reps.

Make these more challenging by a) bending your elbows and lifting your forearms off the ground so only your upper arm is on the ground or b) lifting your entire arm off the ground and reaching up.

Rear foot-elevated split squat

Rear foot-elevated split squats, also known as Bulgarian split squats, are one of the more challenging single-leg exercises. Performing this exercise with the TRX provides a big challenge to your balance and stability. I recommend getting comfortable doing these with your foot on a stationary surface like a bench or box before attempting the TRX version.

Start in the half kneeling position with the front leg at a 90 degree angle and the back foot in one of the TRX handles with the top of your foot facing the ground. Drive through the front heel until you are in the standing position. Lower yourself back toward the ground to complete the rep.

To protect your joints, the front knee must always stay in line with your toe. Drive through the heel of the front foot to increase activation of the glutes and hamstrings. If you struggle with balance, find a focal point in front of you to stare at throughout the entire set.

These can be rather difficult even with no modifications; however, stronger trainees can hold dumbbells or kettlebells for an extra challenge.

Core trio: Jackknife, mountain climber, pike

I couldn’t pick one favorite TRX core exercise so I’ve included three. Try performing all three in a circuit for an added challenge.

Each of these exercises begins in a pushup position plank with your feet secured in the TRX handles. It’s important to maintain this plank position during each exercise. During the jackknives and mountain climbers your body should remain stationary from hips to head. Your butt should never rise toward the ceiling.

Aim to prevent excess movement in your spine during the pikes. Movement should only come from the shoulders and hips.

Whether you are looking for some variety in your gym training or are searching for a way to have more effective workouts on the road, the TRX could be the answer. If you’re interested in learning more tips, tactics, and strategies for training on the road or with a busy schedule, please subscribe to my email newsletter here.


4 Ways to Get the Most Out of Your Workouts

If you’re a professional, your life is always busy. My clients roster includes executives, software engineers, attorneys, accountants, day traders, and bankers. Many of them have families and active social lives. Some spend several hours each day commuting from the suburbs. Getting the most out of their workouts is not just a nice idea, it’s a necessity.

Yet despite feeling crunched, many people waste time at the gym. I often see gym regulars performing the same workouts year after year with little to show for it. New clients frequently tell me they don’t have a plan when they show up for their workouts. And don’t even get me started on all the people I see texting, watching videos, or scrolling through social media in between sets.

If you want to make the most of your precious workout time, you need to change the way you train. Keep reading to learn my four favorite strategies to get more bang-for-your buck at the gym.

pexels-photo-268349.jpeg

Keep a training log.

Writing down your workouts lets you assess progress and adjust your training accordingly. If you aren’t tracking your training, you’ll never know if what you’re doing is taking you closer to your goals.

Recording your workouts helps you track progress in the short and long term. You may remember a few lifetime personal records on big lifts, but nobody’s memory is good enough to recall all their personal records for various exercises and rep schemes. I know I have a hard time remembering what I did last week, let alone 3 months ago (in the case of an exercise I haven’t done in a while).

I recommend recording every single workout in a notebook or on your phone. Track the exercises, sets, reps, and weights used for each workout. Track the time and/or distance travelled for cardio workouts.

It’s also useful to note how you felt during the workout. For example, if you found a particular exercise challenging at a certain weight, make a note to focus on form without increasing the weight the following week. Write down any information you think will be useful. Then, periodically review your logs. It’s motivating to look back over months and years of training logs to see how far you’ve come. 

Focus and minimize distractions.

The more you focus during your workouts, the better your results will be. Don’t just go through the motions; really focus on the exercise you are performing at all times. Try to get in the zone as you train.

Set your intention before the set begins. Focus one tempo, using perfect form, owning the entire range of motion, or really feeling the target muscle working.

Phones are perhaps the biggest distraction at the gym. Scrolling through social media, answering emails, texting, or taking calls wastes time and prevents you from training with the intensity necessary to see results.

Keep your phone on you (in Do Not Disturb mode) if you need it for music or to track your workout. If you don’t need your phone, leave it in the locker room.

Training partners can be awesome motivators, but workouts with friends can sometimes devolve into two-hour long gossip sessions. If you train with someone else, stay on each other to keep things moving. You’ll have time to catch up in the locker room after the workout is over.

pexels-photo-110471.jpeg

Use timed rest intervals.

A few years ago I did a program that instructed me to take specific rest intervals between sets. This was the first time I had ever paid much attention to rest. In the past, I took as much time as I wanted before beginning the next set.

Holy crap did this program smoke me! I realized that although I was pretty strong for a beginner lifter, I had been completely neglecting other areas of my fitness (namely cardio).

Some people have the opposite problem: they are used to taking too little rest which prohibits them from using appropriately heavy weights. These people are likely leaving strength and muscle gains on the table even though they feel they are working hard.

If you’ve never held yourself to strict rest intervals before, give it a shot and see how it affects your workout. Here are some ideas to get you started:

  • High rep, lighter, metabolic work (eg arm training in the 12-20 rep range): 30-60 seconds between sets
  • Power work (eg jumps or throws in the 1-5 rep range): 45-60 seconds between sets
  • Moderate/challenging strength work (eg compound movements or assistance work in the 6-12 rep range): 60-90 seconds between sets
  • Heavy, intense strength work (eg barbell lifts in the 1-5 rep range): 2 minutes or more between sets

Follow a program.

Too many people show up to the gym without a plan and decide what to do in the moment based on how they’re feeling. Although doing something is better than skipping the gym entirely, this is no way to get real results. If you value your time or are serious about achieving a goal, you need to follow a training program.

A training program is an intelligently-designed roadmap which helps you reach a goal such as fat loss, building muscle, getting stronger, or recovering from an injury. I write 3-4 month blocks of training consisting of different phases that build off each other. Taking a long-term approach helps my clients build consistency and get better every week without spending hours and hours at the gym.

Once you begin a program, stick with the it until the end. Hopping from program to program wastes time and kills your progress.

There are many ways to find a program. The best way is to hire a qualified online or in-person coach to provide individual guidance. Always ask any potential coach about their approach to programming before you sign up

If you don’t have access to a trainer, you can purchase a DIY program online from someone in the fitness industry you trust and respect. You can also find some good free programs online on various fitness websites. Make sure whatever program you select is appropriate for your skill level and goals.

Looking for a workout program specifically designed for busy professionals? Check out Full45, a three month training program featuring twice weekly workouts you can complete in 45-minutes or less. Click here to learn more and purchase your copy today.

Working with a coach or trainer is one of the best ways to get the most out of your workouts.

If you’re a busy professional who feels like you’ve been getting less-than-stellar results from your workouts, try implementing these tips. I guarantee that with increased focus, fewer distractions, and a good program that you track and periodically review, you will make much faster progress toward your goals without adding extra time or workouts.

Got New Year’s Resolutions? I’ve Got Resources

As 2017 comes to a close, I want to take some time to reflect on everything I’ve covered this year. Since launching this website in mid-April, I’ve written 37 articles covering a wide range of topics related to training, nutrition, and healthy lifestyle. It’s been such a joy for me to use my passion for writing as part of my fitness work, and I’m grateful to everyone who has read and shared my posts.

My two most popular posts this year told the stories of two different phases of my ongoing fitness journey. The first post, How I Lost 30lbs Without Counting Calories, revealed the habits that allowed me to lose weight with minimal stress while living in San Francisco in 2014 and 2015. The second post, 6 Things I Learned From a Year of Online Training With Bryan Krahn, explained some lessons I learned in 2016 and 2017 when I hired a coach to help me get in my best shape ever. I hope some of my experiences can provide insight and clarity on issues you may be dealing with as you chase your own goals.

My objective is to provide clear, simple, actionable tips and inspiration to help you navigate the confusing and contradictory world of health and fitness advice. With that in mind, this week I’ve put together a year-end guide for you. I reviewed my 2017 posts and organized them by topic. Many of you probably have New Year’s resolutions related to health and fitness. However, it’s likely that you aren’t 100% sure what steps you need to take to realize those goals. Skim through this post, look for the articles relevant to you, bookmark them for later, and share with others. I hope this guide can help answer some of your questions and give you the resources needed to take the first steps toward a fitter and healthier 2018.

Note – hyperlink text does not appear in another color. Hover over the text to find links to each post

pexels-photo-732189.png

Healthy eating

Year after year, weight loss is the most common New Year’s resolution. If you want to lose weight, take control of your eating. Calories must be managed to create a deficit. This requires you to cook more, manage portions, choose more nutrient-dense foods, and combat destructive eating habits like emotional eating. These are all great skills to master even if you are happy with your physique.

  • Cooking more of your own meals is an important step in making healthier food choices. Check out these articles for tips on how to become a better home cook:
  • It’s not always possible to prepare your own food. This post provided strategies for eating out at restaurants when you are on a diet.
  • One of the easiest ways you can improve the quality of your diet, regardless of whether you want to lose weight, is to eat more vegetables. In this post, I explain how I overcame my dislike of vegetables and transformed them into a centerpiece of my diet.
  • Finally, for many people healthier eating means taking control of destructive eating habits such as emotional and stress eating. Check out these posts for tips on combating these challenging obstacles:

Training

It’s no secret that I think everyone should perform some kind of regular resistance training. Strength training builds strong muscles and bones and makes our bodies more efficient. However, it can be confusing, overwhelming, and intimidating to get started with lifting weights. Check out some of these resources if you want help establishing a new routine or improving your current routine.

  • If you want more information on how to train around pain and injuries:

Consistency and Routine

Many New Year’s resolutions fail because people are too ambitious right out of the gate. If you aren’t in the habit of coming to the gym every day or prepping all of your meals, you should set more realistic initial goals. First work to build better systems and develop consistent routines. Real change is made by developing sustainable healthy habits. Start where you are and take one small step forward every day.

  • If you struggle to have healthy food available when you need it:
  • This post on seasons of lifting provides ideas and inspirations for organizing a year’s worth of training. This is a great strategy to ensure your fitness goals mesh well with your life outside of the gym.

pexels-photo-273011.jpeg

Mindset and More

Mindset is the secret sauce to achievement. You can have all the practical knowledge in the world, but if you don’t surround yourself with good people, practice patience, believe in yourself, and choose goals that resonate with your values, you will never truly succeed.

That’s a wrap on 2017. As always, feel free to reach out with any questions or ideas for a future blog post. If you are interested in working with me, please fill out an application for my online training program here. Thank you all for your continued support!

All About Cardio

Cardio is one of the most confusing subjects in the world of fitness. On the one hand, cardio kings and queens claim the only way to build the body of your dreams is to perform hours and hours of cardio every week. On the other hand, hardcore meatheads warn that performing any cardio at all will kill your hard-earned strength gains. If you are a normal person who just wants to look and feel better, how do you figure out what to do?

As usual, the answer lies somewhere in the middle. Every person should include some cardio as part of a well-rounded exercise routine. However, it is possible to do too much cardio or choose activities that aren’t a good fit for your body or your fitness levels. This post should help you better understand how to best incorporate cardio into your workouts. Keep reading to figure out the what, how much, and when of setting up a smart cardio routine.

17-running-on-track.jpg

What do do?

There are two different kinds of cardio: low intensity cardio and high intensity cardio, often called HIIT (high intensity interval training). When performing low intensity cardio, the goal is to keep your heart rate between 120 and 150 beats per minute. HIIT pushes your heart rate above this threshold for short periods followed by periods to rest and recover.

To be successful with low intensity cardio, it’s essential to choose a modality you enjoy. There are many different ways to get in your cardio. If you hate running, try cycling or walking instead. If you don’t like cardio machines, go for a swim or do something outside. If you get bored easily, listen to a podcast or audiobook or watch your favorite tv show. Be creative and experiment with different tools and approaches until you find the options that work best.

Here are a few ideas to get you started:

  • Machines: Treadmill jogging or walking, stationary bike, elliptical, stair climber, rowing machine, arm bike
  • Other options: Running, walking, hiking, cycling, skateboarding, swimming, kayaking, pick-up sports, martial arts, etc.

If you have any joint problems, such as knee or lower back pain, it’s best to choose low impact cardio options. Stay away from things like running and jumping and instead choose activities like swimming, walking, or cycling.

I have previously written in-depth about high intensity interval training. You can read more about equipment and timing options for HIIT here.

How much?

After you’ve decided how you will perform your cardio, the next step is to determine how much you need to do to get the desired training effect.

At this stage, I want to clarify why we are doing cardio in the first place. Lots of people view cardio as a way to burn extra calories to help them lose weight or make up for an unhealthy diet. In reality, calorie burn is not the main objective of cardio (if weight loss is your goal, aim to set up a caloric deficit by altering your diet first, then add in extra cardio only when progress stalls.) I suggest you view cardio primarily as a way to promote recovery from strength training, increase focus, and build a healthy heart and cardiovascular system. You should perform just enough cardio to feel great without placing unnecessary stress on your body.

I recommend beginners start with just 10-20 minutes of cardio performed 2-3 days per week. Certain modalities, such as the stairmaster and rower, are more challenging than others and will require shorter initial training times. If you are new to the gym, training for shorter periods of time can also make it easier to stick to a workout routine.

As your level of cardio fitness improves, gradually increase your training time. More advanced trainees can alternate between shorter sessions of 10-30 minutes and longer sessions of 30-60 minutes. You can perform cardio up to 6 days per week depending on your goals, stress levels, and the volume and intensity of your strength training routine.

However, more cardio is not always better. In fact, it is absolutely possible to perform too much cardio. Performing hours and hours of cardio every week can lead to excessive buildup of stress hormones and place unnecessary wear and tear on your body. Too much cardio can:

  • Lead to increased stress levels, making it difficult to recover, sleep, or lose weight
  • Greatly increase your appetite, making it difficult to stick with a healthy eating plan
  • Lead to overuse injuries from too much repetitive motion

When in doubt, start with a couple of low intensity cardio sessions per week. Pay attention to how you feel as you slowly add more or longer sessions. Success depends on finding the right balance for you.

cyclists-trail-bike-clouds-163407.jpeg

When to do it?

Finally, you need to  figure out the best times to fit cardio into your routine. Short sessions can be added to the end of strength training sessions. Longer sessions work better as stand-alone sessions. In general, you should not perform cardio before you lift weights. You want to save your focus and energy to push yourself in the weight room.

Perform your most intense cardio (HIIT, density training), earlier in the week. As the week moves on, choose lower intensity cardio options to promote recovery. Keep in mind that HIIT can be just as taxing on the body as a heavy strength training session. Perform HIIT sessions after a lower body lifting day whenever possible.

Morning is generally the best time to perform cardio because it’s when your body naturally produces the highest levels of stress hormones. Many people feel refreshed and focused after a session of low intensity morning cardio. However, performing your cardio in the morning isn’t essential. As with any form of exercise, the best time is always the time that allows you to be the most consistent.

Regularly performing cardio can do wonders for your physical and mental health. Use the tips in this post to help you determine the best methods, timing, and scheduling for your goals and ability level. If you want some help figuring out how cardio fits into your training routine, please reach out to me here.

Seasons of Lifting

Do either of these sound like you?

  • It’s May and suddenly beach season seems imminent. Unfortunately, you realize you’ve been skipping workouts and eating poorly for the last four months. Now you are scrambling to get in shape as fast as possible. Although you start off strong, your efforts are derailed as summer arrives and you find yourself enjoying drinks with friends at your favorite rooftop bar and stuffing yourself at weekend barbecues.
  • You decide you want to lose 20 lbs so you start a new diet. However, things are getting very crazy for you at work. Between the chaos of business travel, lack of time to prepare healthy food, and large amounts of stress, you soon find yourself giving up your attempts to get in shape.

Many people fail to live up to their eating and exercise aspirations because they choose unrealistic goals that don’t mesh well with their daily lives. Rather than attempting to overhaul your entire life, it’s best to look for ways to incorporate training and healthy eating into your current routine. You will certainly have to sacrifice and make changes to get in shape, but that doesn’t mean you need to force a square peg into a round hole.

One of the easiest ways to set yourself up for success is to modify your routine based on the seasons. Even in places without true seasons (I’m looking at you, California), most of us have alternating periods of grinding and relaxing throughout the year. Different seasons are filled with activities that influence your eating, activity levels, and stress. It makes sense to plan your training around these factors.

This blog post provides a few ways you can use the changing seasons to help you plan out a year of training and eating. At the end, I explain what to do if your personal schedule doesn’t fit with my general recommendations.

Winter/Spring

Many people begin the year with a diet after a holiday season filled with various indulgences. There aren’t many holidays in the first few months of the year, which makes it easier to cut back on eating out or social obligations involving food or alcohol. This is also a time when many people are the busiest at work. For these reasons, the winter is a great time to focus on fat loss.

Although diet is the main driver of fat loss, your training plays a role as well. You should always aim to retain as much muscle as possible when dieting. Keep pushing yourself in the gym and strive to make progress even as you get leaner. Although you may want to add in some extra cardio or high intensity interval training to your training during this season, weight training should remain your top priority.

No matter what type of training program you follow, keep a close eye on recovery. Dieting is stressful on the body and compounding this stress with too much training volume or intensity can lead to burnout, injuries, or chronic fatigue. High intensity interval training can be especially draining, so start with just one session per week and increase only if fat loss progress stalls.

pexels winter.jpeg

Summer

Most people want to have fun and relax during the summer. Between summer Fridays (which are huge in Chicago where I live), family vacations, and weekends by the beach, there is a lot going on in our lives outside the gym. Summer is the time to maintain your performance and physique while still allowing some flexibility to enjoy the seasonal activities.

Training time can be cut back in the summer to get you out of the gym faster. You can also move some of your workouts outside to get in some extra sunshine and Vitamin D. Hill sprints, track workouts, or bodyweight workouts in the park are all great options during nice weather.

pexels beach.jpeg

Fall/Winter

The last four months of the year are filled with holidays, feasts, and parties, most of which involve lots of food. Rather than stressing out about gaining weight during this time, harness those extra calories to seriously crush your workouts.

Fall training should be intense enough to promote muscle or strength gains. Lift some heavy weights, set some new records, or challenge yourself with a high volume hypertrophy-focused program. Although anyone can lose fat with diet alone, hard training is necessary to stimulate strength and/or muscle gains. Chasing these goals at a time of year when eating supports them ensures you will keep getting better year after year.

pexels fall.jpeg

Plan Your Training Around Your Year

Many people will find the above recommendations are a perfect fit for their year. However, your schedule may not follow the seasons. If this sounds like you, look at your yearly calendar and determine when you will be more or less stressed. This could be influenced by busy times at work, planned vacations, family obligations, visitors staying with you, or many other things. For most people, stressful periods tend to fall at more or less the same times every year even if they don’t line up with the seasons.

You can use this information to inform decisions about your training. For example, a three-month stretch filled with travel is a bad time to diet. However, a three-month stretch when things will be more relaxed at work could be an ideal time to try to lose fat. This can also work in reverse: a period when you will be hosting lots of visitors may be a good time to focus on building muscle or strength since you know you will be eating some extra calories. Above, I explain how these periods can line up with the seasons. However, if your year looks totally different feel free to move these blocks around. The goal is to set up a plan that works with your unique schedule.

As we move into December, take some time to sketch out what your next year of training will look like. You don’t need to train with the same intensity, frequency, or programming all the time. Scheduling a year of lifting based on the seasons or big life events will keep things fresh and put you in the best position to be successful. Better planning leads to better results.

If you need help adjusting your training or eating to match your lifestyle, please submit an application for my online coaching program here.

Core Training That Actually Works

A few months ago, I met with a new client who told me she wanted to build more core strength.

This is a common goal I hear from clients of all different ability levels.

My new client mentioned she experienced regular lower back pain after workouts. After a bit of digging, I found out she was regularly performing up 100 crunches at the end of every workout.

Yet when I took her out on the gym floor for an assessment, she could not complete a 20 second plank without arching her back.

Clearly, her current workout was not achieving the desired effect.

Instead of throwing more crunches and planks at this client, I removed these exercises and taught her how to use her core in a different way.

Slowly but surely, her posture improved. She felt much stronger on squats and pushups and no longer experienced back pain after workouts.

How was she able to achieve these results?

Your core is designed to stabilize your torso and transfer force between different parts of your body during activity.

Many popular core exercises can cause discomfort without building a better looking or stronger midsection.

To effectively train your core, your training needs to include more than just crunches and Russian twists; you must prioritize core exercises that force you to resist movement in multiple planes.

These include anti-extension, anti-rotation, and anti-lateral flexion movements.

Rather than jacking up your back and neck with hundreds of crunches, the exercises described below will give you better results with less risk.

Anti-extension

Anti-extension movements challenge your body to resist lumbar extension, or the arching of the lower back.

These movements should form the cornerstone of your core training.

Without anti-extension strength, you will be unable to properly perform many basic exercises like squats, push ups, and deadlifts with proper form.

The most basic anti-extension exercise and the first core exercise I teach to new clients is the dead bug.

To complete a dead bug, lie on your back with your legs rolled off the ground in a 90 degree angle and your arms extended above your chest. Your spine should be completely flat in this position; there should be no gap where air can pass under an arch in your lower back. Take a big breath into your belly and then slowly initiate the exercise by extending the opposite arm and leg toward the ground. Exhale as you reach, then inhale as you return to the starting position.

The goal is to complete the entire set slowly without arching your lower back. When basic dead bugs are no longer challenging, you can progress them by adding resistance via an exercise band, kettlebell, or swiss ball.

Front planks are another great exercise you can use to build anti-extension strength. However, this is not my first choice because if your core is really weak you likely won’t be able to get into a good plank position.

Watch the video for a few tips on how to properly set up for a front plank. If you can’t quite execute this yet, stick with dead bugs for now.

Advanced trainees can test their anti-extension strength with fallout variations. You can perform fallouts using a TRX or other ring system. More commonly, many gyms have a small ab wheel you can use for rollouts. The goal is to maintain a flat back as your arms move up over your head.

A final anti-extension exercise I like is the front-rack carry. Hold two kettlebells in front of your chest in the front rack position (see video) and walk with them. As you walk, keep your rib cage directly on top of your pelvis. Do not lean backwards, arch your back, flare your ribs, or rest the weights on your chest.

Anti-rotation

Anti-rotation exercises test your ability to resist rotation. This is an important skill as many lower back injuries occur during uncontrolled or unintended torso rotation.

Strong anti-rotation strength is also crucial for runners. Good form and endurance require you to run without rotating with every stride.

Read more: What Runners Must Know About Strength Training

I use one primary exercise, the Pallof press, to train anti-rotation strength.

To complete this exercise, stand to the side of a cable stack with a single handle set up at chest height. Your feet should be a bit wider than shoulder width and directly in line with each other. Pull the handle in front of your chest, take a big belly breath, and then exhale as you push your arms out in front of your chest. You will find the weight of the cable stack wants to pull your body around toward it; resist this force and keep your posture squared and straight. Finish the rep by returning your hands to your chest.

There are few ways to progress this exercise if it becomes easy.

First, change your stance. Half-kneeling and tall-kneeling Pallof presses decrease your base of support and force you to truly engage your core to stay square.

You can also add pauses with your arms in the extended position rather than simply returning to your chest immediately after each rep.

Anti-lateral flexion

The final category of anti-movement teaches you to resist bending side to side. The basic side plank is a great example.

Set up on your side with your forearm on the ground and your elbow directly beneath your shoulder. Stack your legs on top of eachother, then use your hips and obliques to push yourself off the floor into a straight line.

Side planks can be quite challenging if you have never tried them before, so start with just 5-10 seconds and build from there.

Another exercise I use to train anti-lateral flexion is the 1-arm farmer carry. Grab a heavy weight in one hand and walk around with it. The goal here is to maintain a tall, balanced posture. Do not lean too far to the opposite side or rest the weight against your leg.

Putting it all together.

If you want to challenge your core strength, try a few of these movements which force you to resist movement in multiple planes at once.

Advanced plank variations

Cross-body carry (combines 1-arm farmer carry and front rack carry)

Proper core training requires you to train your core as a part of your whole body. The muscles of the core must be able to stabilize your position as you move around. Make sure to include some anti-movements in your normal workouts to build a stronger core, reduce back pain, improve form on other exercises, and truly test your body.

If you want a workout program that makes you feel better instead of leaving you feeling beat up, please fill out an application for my online training program here.

Improve Your Conditioning with Finishers

Almost everyone should include some kind of regular conditioning work in their exercise program. Metabolic conditioning allows you to operate at higher intensities for longer periods of time. This is great for anyone involved in recreational sports or physical hobbies. It also means you will have an easier time pushing yourself during your gym workouts, as your heart rate won’t rise as fast and will recover to normal levels more quickly. If you are trying to lose fat, adding in 1-2 conditioning sessions per week can accelerate your results. Most importantly, regular conditioning work will make you much more dangerous and harder to kill in the event of a zombie apocalypse. Who doesn’t want that?

This week’s post shares some of my favorite metabolic conditioning workouts. These are often referred to as “finishers” because they are included at the end of the workout. Always start slow and pick finishers that use gym tools you are already familiar with. If you are unsure how to use a particular implement, consult a qualified coach or trainer.

Cardio finishers

Sprints

Perhaps the easiest way to add a finisher to the end of a workout is to hop on a piece of cardio equipment for a round of sprints. Sprints are short bursts of all-out effort followed by longer periods of rest or easy work. At the gym, sprints work best on cyclical machines like bikes, rowers, and treadmills. In the warmer months, experienced runners can take their sprints outside to the track or the park. Competent swimmers can perform sprints in the pool year-round.

Sprints are usually measured in time, distance, or percentage of max heart rate. For example, you can sprint for 20 seconds and rest for 40-60 seconds. Equipment that measures your distance traveled allows you to sprint for a certain number of meters. If you own a heart rate monitor, you can work to a given percentage of max heart rate and then rest until your heart rate falls to another predetermined percentage.

Here are a few of my favorite sprint finishers:

  • Stationary bike: Every minute on the minute 20 second sprint, followed by 40 second easy recovery ride
  • Treadmill: 20-30 second sprint, 40-90 seconds rest standing on the side rails
  • Rower: Row 250 meters as fast as possible, rest 1 minute

Always complete a brief warm-up on your chosen piece of equipment before jumping into a sprint. To avoid hamstring strains, it’s best to perform running sprints on a slight incline whenever possible.

If you are new to sprinting or interval training in general, I recommend starting off with just 3-5 rounds. You can gradually add rounds until you are doing 10-20 sprints in a row. The number will vary depending on your chosen equipment. If you feel you are no longer able to exert maximum effort, it’s a good idea to cool down and end the workout for the day.

Completion

A very easy cardio finisher is the completion finisher. This works best on stationary bikes, rowers, and equipment that measures distance or calories burned. Select a given distance or calorie level and try to hit that number as fast as possible. Although they are simple, completion finishers can be punishing and are not for the faint of heart.

Examples:

  • 2000 meter row for time
  • 1 mile bike ride for time

196-treadmill-running

Finishers Using Weights and Calisthenics

You can use a variety of implements around the gym for metabolic conditioning finishers including dumbbells, kettlebells, barbells, medicine balls, bands, and sandbags. You can also keep it super simple and use bodyweight exercises only. Bodyweight circuits are a great option for people who want to train on the road without access to a gym.

For most trainees, it’s best to choose simple exercises you can perform well under a high level of fatigue. Finishers are not the time to introduce a new exercise or try something highly technical. I recommend using moderate or light weights and focusing on moving quickly with good form.

Circuits

A circuit consists of 3-5 exercises that complement each other. You will move from exercise to exercise until you finish the round. Depending on time, you may choose to complete anywhere from 2-5 rounds. Rep ranges will vary based on the exercises selected. Try to move through the circuit as quickly as possible with minimal rest while maintaining good form.

Ladders, Countdowns, and Countups

In this version of a circuit, the number of reps you perform changes each round. I usually choose a descending ladder where you begin with the highest number of reps and end with the lowest number of reps. For a greater challenge, start with the lowest number of reps and work your way up to the highest number of reps in the final round.

You can also use a countdown or countup on just one exercise in a circuit. Here is one of my favorite countdown finishers from Dan John:

  • Kettlebell swings x 20
  • Pushups x 10
  • Keep the swings x 20
  • Pushups x 9, 8, 7, 6, 5, 4, 3, 2, 1

Completion

As with completion finishers using cardio equipment, these finishers require you to complete a given amount of work as fast as possible on a single exercise. It’s best to base these around total reps when using strength exercises. You don’t have to (and likely won’t be able to) complete all the reps at once. Do as many as you can in one set, then rest, then repeat until you complete all the reps.

Examples:

  • 100 kettlebell swings, 100 push-ups, 50 dips, etc.

50-kettlebells.jpg

Other finishers

Battle ropes

You can perform many different battle ropes variations. Some of my favorites are 2-arm slams, alternating waves, shoulder circles, and rotating side slams. Battle ropes work when performed for intervals of time. I often structure a battle ropes finisher the same way I would a sprint finisher.

Here is an example I use with clients:

  • Every minute on the minute for 5-10 minutes: 20 seconds battle ropes followed by 40 seconds rest. Switch between different rope variations or pick just one

Sled and Prowler

My clients know the sled is my favorite gym toy. Few things makes you feel quite as badass as completing a tough workout and then loading up a heavy sled to push, pull, or run with around the gym. If you are lucky enough to train at a gym with a prowler, mix that in as well.

Here a few possible sled or prowler finishers:

  • Pull or push for 25-50 yds 3-5 times, resting in between each round
  • Every minute (or 90 seconds) complete one round, rest the remainder of the time. This works best for shorter distances
  • Perform as many rounds as possible in 10 minutes with minimal rest

bridget sled

My awesome client Bridget crushing the sled at the end of her workout

Faster, Stronger, More Resilient

Conditioning work should be a staple of everyone’s program. If you have only been doing low-moderate intensity cardio and/or strength training, adding in some high intensity intervals a few times a week will accelerate your progress and give a big boost to your overall fitness.

If you want to follow a program that improves all areas of your fitness (including conditioning) but aren’t sure where to start, please reach out to me here.


6 Common Deadlift Mistakes

The deadlift is probably my favorite exercise. There is something incredibly badass about walking up to a heavy bar and picking it up. You are totally on your own – no spotter, no power rack or bench, no fancy equipment – just you and the weight. I’ve been known to grind out a challenging deadlift for up to 10 seconds. Heavy deadlifts are a true testament to your grit, mental toughness, and all-around physical strength. I love coaching others up to their first big deadlifts because it’s one of the most empowering things you can do in the gym.

powerlifting meet

My personal best deadlift, 150 kg in April 2014

These days more and more people are catching on to the fact that deadlifts are awesome. Unfortunately, as deadlifts become more popular, the prevalence of bad technique has increased. Deadlifts are one of the most commonly butchered exercises I see at the gym. Because of the nature of the movement, poorly executed deadlifts repeated over and over at heavy loads set you up for acute injuries or chronic pain down the road. It’s important to understand proper form and fix any bad habits before they cause damage.

In this article, I share some of the most common deadlift mistakes I see with new clients and people around the gym. I’ve included plenty of videos and photos to show you what what a proper deadlift looks like and help you spot form errors.

If you are a new lifter, I always recommend spending some time working in-person with a qualified coach to help ensure you are moving properly. Be smart and never train through pain. See a physician if you have any medical concerns.

Mistake #1: Choosing the wrong deadlift type for your body

Sometimes bad deadlift form results from choosing a setup that doesn’t work for your body or skill level. The conventional deadlift is not the best choice for the average gym goer. In order to safely get into a conventional stance you need a great degree of hip mobility. If you sit at a desk all day, there’s a good chance your mobility is lacking. Additionally, some body types are simply not well-built for this position.

If conventional pulling feels all wrong, there are two alternatives I recommend. If your gym has a trap bar (also known as a hex bar), try that first. The higher handles positioned outside the body make the trap bar a very user-friendly implement. You can also try switching to a sumo stance with a regular barbell. A sumo stance is more upright and therefore requires less hip mobility.

Finally, some people simply shouldn’t be deadlifting from the floor at all. If you are very tall, have very poor mobility, or are dealing with lower back issues, you should choose a top-down or elevated deadlift version. Options include Romanian deadlifts, rack pulls, or block pulls.

I wrote a whole post on choosing the right deadlift for your body type if you want more options and information.

Mistake #2: Not setting the upper body correctly

I can predict if someone is going to round their lower back during the deadlift by how they position their upper back, shoulders, and arms during their setup. If you can get your upper body locked in, you greatly reduce the chance of your form breaking down as you start to pick up the bar.

First, you want to pull your shoulders back and down. Do not allow the shoulders to be rotated in toward your chest or elevated toward your ears. Think about keeping the chest tall and pulling your shoulder blades into your back pockets. If you had writing on your shirt, someone standing across the room should be able to read it throughout the entire lift.

IMG_8326

Incorrect: rounded upper back and internally rotated shoulders

Next, you want to get the muscles of your middle back firing. Think about squeezing an orange in your armpits. You should feel some activation running from you armpits down to the bottom of your rib cage. Keep the bar pulled close to your body (more on this below).

Finally, your arms should be completely locked out throughout the lift. Yanking the bar up with bent arms is a great way to aggravate the tendons of the shoulders and biceps. Instead, think about engaging the triceps as you would in the bottom of a tricep pressdown. This ensures your elbows are completely extended.

IMG_8327.jpg

Incorrect: unlocked arms

During the deadlift, the muscles of your upper body help by firing in this tight, immovable position. They should not be actively flexing or changing position. Once you have successfully followed these steps, your upper body should remain locked in this position throughout the lift.

Mistake #3: Letting the bar get away from you

The bar should should be held tight against your body throughout the entire deadlift. Keeping the bar close allows you to properly tap into the power of your legs and ensures that your spine doesn’t handle too much of the load. If you let the bar drift out in front of you, you greatly reduce your chances of completing the lift and increase the risk of injury.

IMG_8325

Incorrect: bar too far away from the body

When you set up, pull the bar in tight against your legs. This should happen somewhat automatically when you establish upper back tightness and proper shoulder position in your setup. Think of your body as a tight wedge and focus on squeezing your armpits against your sides. Maintain contact with your legs as you complete the lift and don’t allow the bar to drift out in front of you.

If you are someone whose hips shoot up at the top of your deadlift, bar position and upper back tightness are likely the culprits. If you can keep the bar pulled tight against your body as you initiate the lift, you will have more success moving your body as one unit. This was a huge game changer for my own deadlift.

If you are struggling to keep the bar close, try using the following drill. Attach one end of a band to the barbell and the other end to a power rack or some other immovable object in from of you. A strong partner can also assist you by holding the other end of the band. Now, try to complete the lift without letting the band pull the bar away from you. This teaches you to actively pull the bar into your body.

I’ve also found supersetting light sets of straight arms pulldowns in between sets of deadlifts helps clients activate the lats and learn what a tight position feels like. Focus on squeezing the armpits and holding the flexed position for one second.

I recommend wearing long socks, leggings, or pants on deadlift day. Dragging the bar up unprotected legs can lead to bruising or cuts on your shins. You never want to compromise form because you are worried about something cosmetic.

Mistake #4: Turning the deadlift into a squat

This tip is especially relevant for conventional and trap deadlifting since sumo deadlifts are inherently a bit more squat-like. When you set up for a conventional or trap bar deadlift, be careful not to dip your hips too low. Your deadlift should not look like a squat. In a squat, the torso is more vertical and the knees are out over the toes. In a hip hinge (deadlift), the torso should be more bent and the shins should be mostly vertical. This position is more advantageous for picking up a object from the floor as it allows you to properly tap into your posterior chain (back, hamstrings, and glutes). You will never be able to deadlift much weight if your deadlift is closer to a squat than a hinge.

IMG_8323

Incorrect: deadlift looks like a squat. Notice the very low hip position and more vertical torso angle

You may be making this mistake if you are constantly banging the bar into your knees. Spend some time drilling your hip hinge mechanics to learn how to properly reach back and load your posterior chain. If you can’t get into a good hinge with a conventional stance, switch to a sumo stance.

This video shows another drill you can use to improve the bar path during your deadlift by pushing back more from the hips.

Mistake #5: Hips too high at the start of the pull

Think of this mistake as the inverse of the previous tip. Some conventional and trap bar pullers set up with their hips so high that their torsos are parallel to the ground. This position reduces the power of the legs and places excess demand on the spine to complete the lift.

To fix this, set tension in the upper body and then sit the hips back slightly until you feel the point of peak tension in the hips and hamstrings. The strongest hip position is generally somewhere between this torso-parallel setup and the squat setup addressed in the previous tip.

IMG_8322

Incorrect: hips too high. You need to sit back slightly from this position to maximize recruitment of the legs. 

This mistake can also occur with sumo deadlifting. In the sumo position, always try to stay as vertical as possible. Think about dropping your hips directly over the bar rather than hinging them back behind you.

Mistake #6: Not using the glutes at lockout

The lockout, or finishing position of the deadlift, is crucially important for maximizing the effectiveness of the lift. The main force driving you into lockout at the top of the deadlift should be your glutes. I frequently see people leaning into the top of the deadlift, over exaggerating the lockout by pushing the hips forward and hyperextending their lower back. This is a dangerous position for the spine when under heavy loads.

Watch this video for a visual representation of what improper and proper lockouts look like:

I always recommend doing a warmup with a few glute activation drills before you deadlift. Sometimes I have clients perform additional sets of bodyweight or band glute bridges in between sets of deadlifts. If you want a big deadlift (or just a nice butt), it’s also a good idea to spend some time specifically building strength in the glutes. My favorite exercises for this are barbell hip thrusts, barbell glute bridges, 1-leg hip thrusts, Romanian deadlifts, 1-leg deadlifts, kettlebell swings, and back extensions.

Another lockout mistake is shrugging your shoulders and using your upper body to help you pull the bar up at the top. Earlier I discussed the importance of setting tension in the upper body and not allowing it to move at all throughout the lift. If you are a shrugger, record your lifts or have a partner watch you to keep you honest. Think about keeping the shoulders pulled into your back pockets and not allowing them to drift up toward your ears.

IMG_8324.jpg

Incorrect: shrugging at lockout

Smarter, Safer, Stronger

Deadlifts are a fantastic exercise that almost everyone should perform. However, it’s crucial to use good form in order to stay safe and make better gains.

The six most common deadlift mistakes are:

  1. Choosing the wrong deadlift variation for your body type. Sumo deadlifts, trap bar deadlifts, or elevated deadlifts may be a better choice than conventional deadlifts for many people.
  2. Not setting the upper body correctly. Prevent rounding of the lower back by starting with proper position of and tension in the upper back.
  3. Letting the bar get away from you. Keep the bar right against your legs throughout the entire lift.
  4. Turning the deadlift into a squat. Make sure you can hip hinge properly before attempting conventional deadlifts.
  5. Positioning the hips too high. Always sit back slightly to maximize recruitment of the legs.
  6. Not using the glutes at lockout. Squeeze your butt hard as you stand up but don’t push the hips so far forward that you arch your lower back. Never shrug at the top of the deadlift.

Want to get better at squatting and deadlifting? Download your free copy of my mini ebook, Squat and Deadlift School below.

I share my favorite form tips, troubleshoot common problems like the ones above, and provide progressions to help you work toward (or supplement) barbell training.

I’m confident both novice and experienced lifters can use the book and accompanying videos to take their training to the next level.