Core Training That Actually Works

A few months ago, I met with a new client who told me she wanted to build more core strength.

This is a common goal I hear from clients of all different ability levels.

My new client mentioned she experienced regular lower back pain after workouts. After a bit of digging, I found out she was regularly performing up 100 crunches at the end of every workout.

Yet when I took her out on the gym floor for an assessment, she could not complete a 20 second plank without arching her back.

Clearly, her current workout was not achieving the desired effect.

Instead of throwing more crunches and planks at this client, I removed these exercises and taught her how to use her core in a different way.

Slowly but surely, her posture improved. She felt much stronger on squats and pushups and no longer experienced back pain after workouts.

How was she able to achieve these results?

Your core is designed to stabilize your torso and transfer force between different parts of your body during activity.

Many popular core exercises can cause discomfort without building a better looking or stronger midsection.

To effectively train your core, your training needs to include more than just crunches and Russian twists; you must prioritize core exercises that force you to resist movement in multiple planes.

These include anti-extension, anti-rotation, and anti-lateral flexion movements.

Rather than jacking up your back and neck with hundreds of crunches, the exercises described below will give you better results with less risk.

Anti-extension

Anti-extension movements challenge your body to resist lumbar extension, or the arching of the lower back.

These movements should form the cornerstone of your core training.

Without anti-extension strength, you will be unable to properly perform many basic exercises like squats, push ups, and deadlifts with proper form.

The most basic anti-extension exercise and the first core exercise I teach to new clients is the dead bug.

To complete a dead bug, lie on your back with your legs rolled off the ground in a 90 degree angle and your arms extended above your chest. Your spine should be completely flat in this position; there should be no gap where air can pass under an arch in your lower back. Take a big breath into your belly and then slowly initiate the exercise by extending the opposite arm and leg toward the ground. Exhale as you reach, then inhale as you return to the starting position.

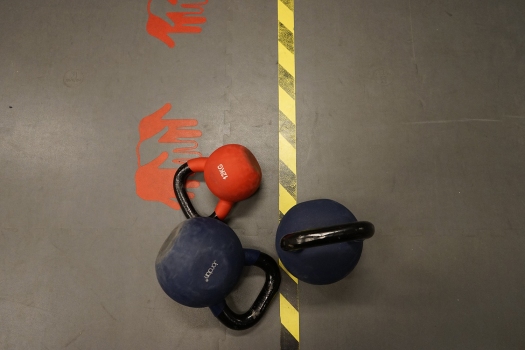
The goal is to complete the entire set slowly without arching your lower back. When basic dead bugs are no longer challenging, you can progress them by adding resistance via an exercise band, kettlebell, or swiss ball.

Front planks are another great exercise you can use to build anti-extension strength. However, this is not my first choice because if your core is really weak you likely won’t be able to get into a good plank position.

Watch the video for a few tips on how to properly set up for a front plank. If you can’t quite execute this yet, stick with dead bugs for now.

Advanced trainees can test their anti-extension strength with fallout variations. You can perform fallouts using a TRX or other ring system. More commonly, many gyms have a small ab wheel you can use for rollouts. The goal is to maintain a flat back as your arms move up over your head.

A final anti-extension exercise I like is the front-rack carry. Hold two kettlebells in front of your chest in the front rack position (see video) and walk with them. As you walk, keep your rib cage directly on top of your pelvis. Do not lean backwards, arch your back, flare your ribs, or rest the weights on your chest.

Anti-rotation

Anti-rotation exercises test your ability to resist rotation. This is an important skill as many lower back injuries occur during uncontrolled or unintended torso rotation.

Strong anti-rotation strength is also crucial for runners. Good form and endurance require you to run without rotating with every stride.

Read more: What Runners Must Know About Strength Training

I use one primary exercise, the Pallof press, to train anti-rotation strength.

To complete this exercise, stand to the side of a cable stack with a single handle set up at chest height. Your feet should be a bit wider than shoulder width and directly in line with each other. Pull the handle in front of your chest, take a big belly breath, and then exhale as you push your arms out in front of your chest. You will find the weight of the cable stack wants to pull your body around toward it; resist this force and keep your posture squared and straight. Finish the rep by returning your hands to your chest.

There are few ways to progress this exercise if it becomes easy.

First, change your stance. Half-kneeling and tall-kneeling Pallof presses decrease your base of support and force you to truly engage your core to stay square.

You can also add pauses with your arms in the extended position rather than simply returning to your chest immediately after each rep.

Anti-lateral flexion

The final category of anti-movement teaches you to resist bending side to side. The basic side plank is a great example.

Set up on your side with your forearm on the ground and your elbow directly beneath your shoulder. Stack your legs on top of eachother, then use your hips and obliques to push yourself off the floor into a straight line.

Side planks can be quite challenging if you have never tried them before, so start with just 5-10 seconds and build from there.

Another exercise I use to train anti-lateral flexion is the 1-arm farmer carry. Grab a heavy weight in one hand and walk around with it. The goal here is to maintain a tall, balanced posture. Do not lean too far to the opposite side or rest the weight against your leg.

Putting it all together.

If you want to challenge your core strength, try a few of these movements which force you to resist movement in multiple planes at once.

Advanced plank variations

Cross-body carry (combines 1-arm farmer carry and front rack carry)

Proper core training requires you to train your core as a part of your whole body. The muscles of the core must be able to stabilize your position as you move around. Make sure to include some anti-movements in your normal workouts to build a stronger core, reduce back pain, improve form on other exercises, and truly test your body.

If you want a workout program that makes you feel better instead of leaving you feeling beat up, please fill out an application for my online training program here.

Better Health and Fitness Through Gratitude

This Thursday is Thanksgiving, the day Americans set aside to celebrate all the things we are grateful for in our lives. For many people this means gatherings with friends, family, and other loved ones. Some people may spend the holiday alone due to work or other reasons. Regardless of how we spend the day, most of us will spend at least a bit of time reflecting and giving thanks.

Although gratitude is an overused word these days, it can still be a powerful tool to help live a more positive, fulfilling life. Practicing gratitude enables us to see the positive in any situation. It teaches us to celebrate the things that enrich our lives even in the face of struggle and hardship. The perpetual optimist who always tries to appreciate the things they do have will be much happier than the person who constantly dwells on the negative, thinking only about the unfair burdens they’ve had to bear or what is lacking in their life.

As you give thanks this week, consider your attitude toward your health and fitness. Are you someone who looks forward to daily movement and loves the way you feel after filling your body with nutritious food? Or are you someone who dreads the gym, eats junk regularly, and constantly feels run-down or lethargic? Do you take ownership of your choices or do you feel like eating right and exercising are impositions placed on you by someone else? If you are struggling to make exercise and healthy eating a regular part of your life, take a step back and use gratitude to reframe your situation. Getting in shape is tough, but being thankful for the things you are able to do goes a long way in helping you push through challenges.

pexels vegetables.jpeg

Exercise as a celebration of movement and life

I know how hard it can be to find the motivation to work out. After a long day at work, a poor night’s sleep, or unexpected family stress, putting on your gym clothes to get your sweat on is often the last thing on your mind. Compounding this problem may be a toxic attitude toward exercise. For many people, exercise is a form of punishment for eating poorly, looking a certain way, or feeling lazy and apathetic. There is no joy in their workouts and they dread coming to the gym.

To change this, reframe exercise in a positive light. See exercise as a celebration of all the things your body can do. The human body is an amazingly complex, versatile, and resilient machine. Be thankful for the gift of movement and recognize that if you don’t use it, you lose it.

The human brain and body evolved to be intimately connected. Engaging in regular exercise and physical play enables you to feel more connected to your body, encourages mental sharpness and focus, and improves your mood. This is one reason why mental health practitioners always recommend exercise as a part of a well rounded treatment for mental health issues.

One way to get motivated is to find physical activities you actually enjoy. Too many people force themselves into conventional exercise modalities because they think it’s what they’re supposed to do. The reality is that movement comes in many shapes and sizes: walk, run, climb, throw, jump, kick, crawl, lift, swim, pose, stretch, carry, dance, play, and more. Find a handful of activities you enjoy and engage in them regularly. Ensure you have a good foundation of strength and conditioning so you can safely and effectively perform these other activities.

pexels climbing.jpeg

Another way to make exercise more enjoyable is to find a community of likeminded people to support you along the way. This could be as small as one other person or as large as a group of 100 people or more. If you don’t have access to such a group in person, there are numerous online communities designed to provide support, accountability, and encouragement to people of all ability levels chasing every kind of physical goal. Humans are social animals. Going through challenges with others helps you appreciate your own skills and keeps negativity in check by providing some perspective as to what other people are experiencing.

It only takes one accident or serious ailment to rob you of your ability to move. Don’t take this amazing gift for granted or let it slip away as you age. Be grateful for your good mobility and engage in whatever kinds of movement feel best to you.

Healthy eating as a gift to your body and brain

Dieting is inherently challenging. You have to push your body to an uncomfortable place in order to see changes. Experiencing hunger, practicing self-restraint, resisting temptation, and dealing with pressure from friends and family are all par for the course when you go on a diet. These uncomfortable sensations can compound to make you miserable if you let them.

Instead of getting caught up in negativity or self-pity, reframe dieting as a temporary discomfort that ultimately allows you to live a healthier life. Think of healthy eating as a gift to your body and brain. When you fill your body with nourishing foods, you look, feel, think, and perform better. This makes everything in your life more enjoyable.

Be grateful you live in a place where you are privileged enough to restrict food intake or make healthier choices in order to improve your wellbeing. Many people around the world don’t have access to fresh, healthy foods and still others are suffering from various malnutrition related ailments. If you have the resources to make these changes, you are doing much better than most. Sometimes thinking globally helps put your individual discomfort into perspective.

Another food related reframe centers around holiday eating. Many people experience a great deal of food anxiety over the holidays when they find themselves surrounded by less-than-ideal food choices at parties, gatherings, and family meals. Stress over weight gain can put a huge damper on a time that should otherwise be relaxing and joyous.

Instead of fretting about your diet, take a step back and reconnect with what the holidays are truly about. Take some time to show your appreciation for friends and family. Be grateful for the opportunity to rest, celebrate, and reflect with loved ones. If food is an important part of your holidays, go ahead and relax a bit. Eating has always been a central part of human celebration and you won’t ruin a whole year of hard work with a couple of feasts.

Use gratitude to help you appreciate life more

Nothing worth having comes easily. In all areas of your life – professional, personal, health, and more – you must push yourself through challenges and make sacrifices to move forward and grow. Taking time to be thankful for the gifts we’ve been given goes a long way in making these struggles more bearable. Don’t dwell on the negatives; look for ways to practice gratitude this week and beyond.

If gratitude has you feeling inspired to recommit to your exercise routine, you should check out my 4C System. It’s a totally free five day email course teaching you to become a more consistent exerciser. Sign up using the box below.

3 Mindset Shifts That Helped Me Lose 70+ Pounds and Keep it Off

Statistics about weight loss success are very sobering. Newspapers and magazines claim “diets don’t work” and many people think success is out of reach. We all know someone who has lost a lot of weight only to gain it all back and then some; in fact, it’s often cited that 95-97% of people who successfully lose weight regain it within 3 years. Even more common is the person who always appears to be on a diet but never seems to lose any weight.

old caroline ari

Me at my heaviest, shortly before I decided to lose weight.

My personal story bucks this trend. After struggling with my weight for at least 6 years, my heaviest BMI placed me in the obese category. It took me six months to lose the first 60 lbs and several years longer to lose another 10-15 lbs. Although I still experience weight fluctuations, I have for the most part successfully kept off these 70+ lbs for 6 years and counting.

new caroline ari

Me 70lbs lighter, 5 years later.

What has been the secret to my success? Although I totally changed my eating habits and got serious about exercise, I ultimately don’t believe the specifics of my diet or training plan were most important. Rather, a few key mindset shifts helped me overcome obstacles, stay the course, and ultimately change my entire lifestyle for good. I want to share three of these mindset shifts with you this week in the hopes that you may find inspiration for your own weight loss journey.

Accept that you’re in it for the long haul.

I’ll never forget the first week of my initial journey to lose around 60 lbs. I had a sobering annual checkup with my doctor during which she informed me I was prediabetic and would need to make some serious changes to avoid a descent into full-blown Type-II diabetes. As a 19 year old, this scared the shit out of me. I had my whole life ahead of me and had no interest in managing a chronic condition that was totally avoidable.

It was just after this appointment when a friend of mine shared her aunt’s cooking blog on Facebook. The blog is unfortunately no longer running, but the thing that stuck out to me was a post from the author detailing the 10 steps she used during her own weight loss journey. These steps included things like managing calories, tracking food intake, cooking your own food, combining strength training and cardio, and reducing consumption of refined and packaged foods. For whatever reason, the simple steps on this list (most of which were things I already knew I should probably be doing) clicked for me in the moment. I finally felt I had a concrete, realistic plan I could follow that would almost certainly result in weight loss if I stuck with it.

Most importantly, I fully understood it would take me a long time to lose the weight I needed and wanted to lose. This acceptance did not feel overwhelming; on the contrary, I felt liberated from the pressure to see dramatic success right away. Something inside of me recognized if I just kept doing the right things, I would ultimately get where I wanted to go. Accepting that I was in it for the long haul gave me the courage to take the first steps forward.

Takeaway: Practice patience. Changing your physique often takes way longer than you expect. You can’t give up if you don’t see immediate results within the first few weeks. Remember that regardless of whether you make any changes, time is going to pass anyway. Wouldn’t you rather be slightly leaner and healthier after a year than to remain where you are or gain more weight?

You don’t have to change everything at once. Small, incremental changes maintained consistently will have big payoffs in the long run. Determine what your biggest problem areas are and attack those first. Once you master those changes or if progress slows, look for further changes you can make.

calendar pexels

Be nice to yourself.

Like many people who have struggled with their weight, I used to have severe body image issues and terribly low self-confidence. I was constantly comparing myself to my (I thought) thinner, prettier friends. I told myself I was fat and ugly and would always be that way no matter what I did. Of course none of this ever helped me make positive changes. Contrary to what some believe, shaming others or yourself is not an effective way to motivate long-term change. Rather than feeling bad about themselves or their decisions, people need to believe they have the fundamental capacity for change.

As I lost weight, I developed a new kind of negative self-talk. Each time I “screwed up” on my diet, I felt powerful feelings of guilt and self-loathing. I would beat myself up for days about my poor decisions. I would force myself to dramatically reduce calories in the following days, sometimes even fasting for extended periods of time. Other times I would punish myself with grueling workouts and extra cardio. All of this extra work only fueled a negative cycle that ultimately pushed me into problems with disordered eating.

Read more: 3 Strategies to Combat All-or-Nothing Eating

Takeaway: If you fall off the wagon, be nice to yourself. Remember your success is based on the sum of many weeks and months of decisions. One bad meal, bad day, or even a bad week does not mean you are doomed to failure assuming you make good choices most of the time.

After a screw up, I encourage you to take a “clean slate” approach and get right back to your normal plan as soon as possible. Don’t worry about doing penance for your mistakes – simply focus on nailing the good habits you have been working on.

Accept that failure and screw ups are an inevitable and necessary part of change. Always look for ways to learn from your mistakes so you can handle similar situations differently in the future. Reframe failure as success – you are now a bit wiser and farther along the path than you were before. The people who experience the most success long-term are those who keep picking themselves up and continuing on after they make mistakes.

Read More: Chasing Perfection? Do This Instead.

self love pexels.jpeg

Embrace the Process

When I think about my life now compared to when I was obese, I see a lot of big changes:

  • I used to exercise rarely, now I do some kind of activity 5-6 days per week.
  • I used to eat until I was stuffed at every single meal, now I monitor my portion sizes to ensure I’m eating only the amount of food I really need.
  • I used to binge on junk food all the time, now I center most of my eating around protein, vegetables, fruits, and healthy carbs and fats. I am absolutely not perfect and struggle just like everyone else, but the majority of the time I make healthy choices.

These changes have allowed me to keep off the weight I lost while still enjoying life for many years.

I did not make all of these changes at once; I took things one step at a time. I tried to take a big-picture view and didn’t let myself get caught up in the daily scale fluctuations or the larger fluctuations caused by periods of upheaval and periods of calm and focus. I was not always successful with this, but over time I learned to love the process of taking care of myself. I love to train and cook. I love the way my body feels when I treat it well versus when I make poor choices. I am fully invested in the day-to-day practices that got me to this point. This is the biggest secret to my lasting success.

Takeaway: The secret to maintaining physique changes is to continue doing many of the things you did in order to lose weight. This is the hardest part for many people because they think about dieting all wrong. For some people, as soon as they get to their goal weight they celebrate with junk food and missed workouts because they “earned it.” Over time, returning to these old habits takes you back to the same old overweight you.  

Long-term success requires you to embrace systems of healthy eating, training, and stress management which you can sustain on a daily basis once the diet is over. These need to be flexible enough to provide some freedom but rigid enough to keep you on track most of the time.

One more note on embracing the process: I encourage you to separate yourself from hard goals centered around losing x amount of lbs by y date. The unfortunate reality is you cannot control specific outcomes. Instead, focus on what you can control – the daily habits and practices which compound to ultimately create a leaner, healthier body. Instead of thinking of your goal weight as a destination, think of the rest of your life as a long arch moving toward better health. You have plenty of time and will never truly arrive, so relax and enjoy each step of the journey.

If you want help finally losing weight and keeping it off for good, please reach out to me here to find out more about my online training program.

Improve Your Conditioning with Finishers

Almost everyone should include some kind of regular conditioning work in their exercise program. Metabolic conditioning allows you to operate at higher intensities for longer periods of time. This is great for anyone involved in recreational sports or physical hobbies. It also means you will have an easier time pushing yourself during your gym workouts, as your heart rate won’t rise as fast and will recover to normal levels more quickly. If you are trying to lose fat, adding in 1-2 conditioning sessions per week can accelerate your results. Most importantly, regular conditioning work will make you much more dangerous and harder to kill in the event of a zombie apocalypse. Who doesn’t want that?

This week’s post shares some of my favorite metabolic conditioning workouts. These are often referred to as “finishers” because they are included at the end of the workout. Always start slow and pick finishers that use gym tools you are already familiar with. If you are unsure how to use a particular implement, consult a qualified coach or trainer.

Cardio finishers

Sprints

Perhaps the easiest way to add a finisher to the end of a workout is to hop on a piece of cardio equipment for a round of sprints. Sprints are short bursts of all-out effort followed by longer periods of rest or easy work. At the gym, sprints work best on cyclical machines like bikes, rowers, and treadmills. In the warmer months, experienced runners can take their sprints outside to the track or the park. Competent swimmers can perform sprints in the pool year-round.

Sprints are usually measured in time, distance, or percentage of max heart rate. For example, you can sprint for 20 seconds and rest for 40-60 seconds. Equipment that measures your distance traveled allows you to sprint for a certain number of meters. If you own a heart rate monitor, you can work to a given percentage of max heart rate and then rest until your heart rate falls to another predetermined percentage.

Here are a few of my favorite sprint finishers:

  • Stationary bike: Every minute on the minute 20 second sprint, followed by 40 second easy recovery ride
  • Treadmill: 20-30 second sprint, 40-90 seconds rest standing on the side rails
  • Rower: Row 250 meters as fast as possible, rest 1 minute

Always complete a brief warm-up on your chosen piece of equipment before jumping into a sprint. To avoid hamstring strains, it’s best to perform running sprints on a slight incline whenever possible.

If you are new to sprinting or interval training in general, I recommend starting off with just 3-5 rounds. You can gradually add rounds until you are doing 10-20 sprints in a row. The number will vary depending on your chosen equipment. If you feel you are no longer able to exert maximum effort, it’s a good idea to cool down and end the workout for the day.

Completion

A very easy cardio finisher is the completion finisher. This works best on stationary bikes, rowers, and equipment that measures distance or calories burned. Select a given distance or calorie level and try to hit that number as fast as possible. Although they are simple, completion finishers can be punishing and are not for the faint of heart.

Examples:

  • 2000 meter row for time
  • 1 mile bike ride for time

196-treadmill-running

Finishers Using Weights and Calisthenics

You can use a variety of implements around the gym for metabolic conditioning finishers including dumbbells, kettlebells, barbells, medicine balls, bands, and sandbags. You can also keep it super simple and use bodyweight exercises only. Bodyweight circuits are a great option for people who want to train on the road without access to a gym.

For most trainees, it’s best to choose simple exercises you can perform well under a high level of fatigue. Finishers are not the time to introduce a new exercise or try something highly technical. I recommend using moderate or light weights and focusing on moving quickly with good form.

Circuits

A circuit consists of 3-5 exercises that complement each other. You will move from exercise to exercise until you finish the round. Depending on time, you may choose to complete anywhere from 2-5 rounds. Rep ranges will vary based on the exercises selected. Try to move through the circuit as quickly as possible with minimal rest while maintaining good form.

Ladders, Countdowns, and Countups

In this version of a circuit, the number of reps you perform changes each round. I usually choose a descending ladder where you begin with the highest number of reps and end with the lowest number of reps. For a greater challenge, start with the lowest number of reps and work your way up to the highest number of reps in the final round.

You can also use a countdown or countup on just one exercise in a circuit. Here is one of my favorite countdown finishers from Dan John:

  • Kettlebell swings x 20
  • Pushups x 10
  • Keep the swings x 20
  • Pushups x 9, 8, 7, 6, 5, 4, 3, 2, 1

Completion

As with completion finishers using cardio equipment, these finishers require you to complete a given amount of work as fast as possible on a single exercise. It’s best to base these around total reps when using strength exercises. You don’t have to (and likely won’t be able to) complete all the reps at once. Do as many as you can in one set, then rest, then repeat until you complete all the reps.

Examples:

  • 100 kettlebell swings, 100 push-ups, 50 dips, etc.

50-kettlebells.jpg

Other finishers

Battle ropes

You can perform many different battle ropes variations. Some of my favorites are 2-arm slams, alternating waves, shoulder circles, and rotating side slams. Battle ropes work when performed for intervals of time. I often structure a battle ropes finisher the same way I would a sprint finisher.

Here is an example I use with clients:

  • Every minute on the minute for 5-10 minutes: 20 seconds battle ropes followed by 40 seconds rest. Switch between different rope variations or pick just one

Sled and Prowler

My clients know the sled is my favorite gym toy. Few things makes you feel quite as badass as completing a tough workout and then loading up a heavy sled to push, pull, or run with around the gym. If you are lucky enough to train at a gym with a prowler, mix that in as well.

Here a few possible sled or prowler finishers:

  • Pull or push for 25-50 yds 3-5 times, resting in between each round
  • Every minute (or 90 seconds) complete one round, rest the remainder of the time. This works best for shorter distances
  • Perform as many rounds as possible in 10 minutes with minimal rest

bridget sled

My awesome client Bridget crushing the sled at the end of her workout

Faster, Stronger, More Resilient

Conditioning work should be a staple of everyone’s program. If you have only been doing low-moderate intensity cardio and/or strength training, adding in some high intensity intervals a few times a week will accelerate your progress and give a big boost to your overall fitness.

If you want to follow a program that improves all areas of your fitness (including conditioning) but aren’t sure where to start, please reach out to me here.


3 Strategies to Successfully Navigate Holiday Eating

Today is Halloween, which I consider the unofficial start of another holiday season. This time of year is filled with celebrations and gatherings. Along with this comes an endless supply of rich, sweet, and savory foods. All of the year-end holidays center around some kind of feasting and most people have many weekends in a row filled with parties and events for work, family, and friends.

For many people, the joy of this time of year is overshadowed by anxiety surrounding food. This is especially true for anyone who has been working hard to build healthy eating habits or who has recently lost a lot of weight.

You may be asking yourself:

  • How can I navigate the next few months when I am constantly bombarded with less-than-healthy foods?
  • Will I gain tons of weight and cancel out the hard work I’ve been putting in the rest of the year?
  • Will holiday feasts trigger dormant disordered eating habits like bingeing?

I know my clients and I struggle with these questions year after year.

This week, I want to share 3 strategies for dealing with Halloween, Thanksgiving, and all the other upcoming holidays. After reading this post, I hope you will be able to arm yourself with the mindset tools you need to enjoy a stress-free holiday season.

pexels pumpkin.jpeg

Option 1: Stick with the plan and don’t indulge.

How it works

This option requires you to refrain from indulging in treats during the holiday season. Essentially, you will continue with your current eating plan. This means no Halloween candy from the break room, no pumpkin pie, and no extra drinking at office Christmas parties.

At big holiday feasts, you will need to stick with protein, vegetables, and carbs and fats that fit within your macros or meal plan. In the most extreme cases, you may need to bring your own food to certain functions when you know you won’t have options available to fit your plan.

Who it works for

This is the best option for anyone who needs to stay in great shape this time of year for upcoming events including physique competitions, photo shoots, weddings, beach vacations, etc.

It may also be the best option for people who have struggled with severe disordered eating. Sometimes the best course of option is total abstinence from trigger foods. If you chose to abstain from certain foods year round, the holidays may not be the best time to reintroduce them to your diet.

Problems

I don’t recommend this option for several reasons.

If you bring your own food to family gatherings, you may be mocked or receive disgruntled looks from other guests. Expect to deal with lots of stress and difficult decisions about which events to attend and which you may need to skip.

Telling yourself you will abstain also sets you up for failure because it is very difficult to follow this course of action. When you inevitably do decide to treat yourself, it is much more likely you will succumb to the all-or-nothing mindset and slide into an episode of binge eating.

Read More: 3 Strategies to Combat All-or-Nothing Eating

The reality is this level of discipline is impractical and totally unnecessary for most people. Holidays are about celebrating and food has always been an important part of celebrating. Removing yourself from the festivities creates unnecessary stress and tension between you and loved ones.

Option 2: Choose your indulgences and set clear guidelines

How it works

With this option, you need to plan and make decisions regarding how you will handle the holiday season. Think about the holiday foods you most enjoy and those you can do without. Honestly evaluate your own tendencies with food and set guidelines that will allow you to enjoy yourself while still preventing you from eating everything in sight.

Here are a few example guidelines you could use:

  • Limit yourself to one plate of food. Take a little bit of everything you want to try rather than loading up your first plate and having to return for seconds.
  • 50% of your plate veggies, 25% protein, 25% other carbs and fats. This ensures you are eating a well-balanced meal while still getting to sample whatever you want.
  • Be picky with your indulgences. Only eat foods that taste amazing. Your grandma’s pecan pie, an unusual cocktail at a fancy party, or a favorite hometown speciality you rarely eat would be good choices. Grocery store sheet cake, Halloween candy in the break room, and other generic treats you can have anytime are not worthy indulgences.
  • Follow the “law of first bites.” Stop eating a food when it ceases to taste just as amazing as it did when you started. You don’t have to finish everything on your plate.
  • Choose to indulge in some types of foods but not others. For example, if you don’t really have a problem with alcohol but you always overeat sweets, set some guidelines for desert but allow yourself to drink whatever you want. You may choose to totally abstain from certain trigger foods but freely eat other foods.
  • Eat slowly. Enjoy your food. Take a sip of water in between bites. When food is in your mouth, your fork should be on your plate.

Who it works for

This is the best option for people who have been working hard to change their bodies and improve their eating habits. It allows you to relax the reins a bit and enjoy a well-deserved mental break without totally losing control or diving into a mountain of deserts.

If you want to relax a bit this holiday season but don’t have a long history of making good food choices, establishing some guidelines to prevent things from getting out of hand is the best plan of action.

Problems

There aren’t any obvious drawbacks to this option, but it can take a lot of work and requires constant self-evaluation. As you are moving through the season, check-in with yourself periodically to see how you are doing.

Questions for self-evaluation include:

  • How is this plan working for me?
  • Am I feeling myself start to lose control?
  • What am I handling well?
  • Where do I need to tweak or modify my plan?
  • If I messed up, how can I learn and do better at the next holiday meal?

pexels baked goods.jpeg

Option 3: Eat whatever you want, but let go of guilt

How it works

With this option, you release yourself from all rules surrounding food for a while. You can truly eat whatever you want, whenever you want it. What I’ve found is although people who follow this approach eat a lot of junk at first, those who have truly adopted a healthy lifestyle will still make good choices most of the time.

The most important caveat to this option is you must let go of all guilt and shame surrounding your food choices during the holiday season. Indulging in lots of less-than ideal food and then beating yourself up about it afterwards is terrible for your mental health and peace of mind. If you want to indulge, indulge. But tell yourself you won’t tolerate any negative self-talk after the fact.

Who it works for

This option works for people who have a rock-solid relationship with food. If you are the kind of person who can eat one serving from a bag of chips or a candy bar and then put it away, this option could work well for you.

If you don’t think you can handle this, I recommend following option 2 and establishing some guidelines to help when you are most vulnerable.

Problems

If you haven’t done the work to develop a healthy relationship with food, this option can lead to disaster. I learned this the hard way.

Last year, I decided I would treat the week of Thanksgiving as a total diet break. Over the course of five days, I went completely overboard with my eating. Every night I went to bed so stuffed I was in physical pain. I ate everything I possibly could just because I told myself it was ok. Often times, I didn’t even truly enjoy what I was eating.

After the week ended, I had an emotional breakdown. I felt totally disgusted with how out of control I had gotten during the week. After a lot of back and forth texting with my coach and a few weeks of normal eating, I returned to my pre-Thanksgiving weight with some important lessons learned.

One good thing to come out of this experience was the realization that feeling guilt and beating myself up over my “screw-ups” was counterproductive and ultimately detrimental to my progress. These days, if I make poor food choices I rarely engage in negative self-talk. Instead, I give myself a clean slate the next day and get right back to plan.

Read More: 6 Things I Learned from a Year of Online Training with Bryan Krahn

Reduce holiday stress

As with most things in your health and fitness journey, successfully navigating the holiday season requires preparation and planning. Remember that you don’t need to be 100% on plan year-round in order to look and feel great. Scheduling some relaxed periods that coincide with other events in your life (such as holidays and vacations) gives you a much needed mental break and may actually help your progress long-term. Be honest with yourself about what you need to put yourself in the best position for success.

If you want help navigating the holiday season this year, please fill out an application for my online training program here.


6 Common Deadlift Mistakes

The deadlift is probably my favorite exercise. There is something incredibly badass about walking up to a heavy bar and picking it up. You are totally on your own – no spotter, no power rack or bench, no fancy equipment – just you and the weight. I’ve been known to grind out a challenging deadlift for up to 10 seconds. Heavy deadlifts are a true testament to your grit, mental toughness, and all-around physical strength. I love coaching others up to their first big deadlifts because it’s one of the most empowering things you can do in the gym.

powerlifting meet

My personal best deadlift, 150 kg in April 2014

These days more and more people are catching on to the fact that deadlifts are awesome. Unfortunately, as deadlifts become more popular, the prevalence of bad technique has increased. Deadlifts are one of the most commonly butchered exercises I see at the gym. Because of the nature of the movement, poorly executed deadlifts repeated over and over at heavy loads set you up for acute injuries or chronic pain down the road. It’s important to understand proper form and fix any bad habits before they cause damage.

In this article, I share some of the most common deadlift mistakes I see with new clients and people around the gym. I’ve included plenty of videos and photos to show you what what a proper deadlift looks like and help you spot form errors.

If you are a new lifter, I always recommend spending some time working in-person with a qualified coach to help ensure you are moving properly. Be smart and never train through pain. See a physician if you have any medical concerns.

Mistake #1: Choosing the wrong deadlift type for your body

Sometimes bad deadlift form results from choosing a setup that doesn’t work for your body or skill level. The conventional deadlift is not the best choice for the average gym goer. In order to safely get into a conventional stance you need a great degree of hip mobility. If you sit at a desk all day, there’s a good chance your mobility is lacking. Additionally, some body types are simply not well-built for this position.

If conventional pulling feels all wrong, there are two alternatives I recommend. If your gym has a trap bar (also known as a hex bar), try that first. The higher handles positioned outside the body make the trap bar a very user-friendly implement. You can also try switching to a sumo stance with a regular barbell. A sumo stance is more upright and therefore requires less hip mobility.

Finally, some people simply shouldn’t be deadlifting from the floor at all. If you are very tall, have very poor mobility, or are dealing with lower back issues, you should choose a top-down or elevated deadlift version. Options include Romanian deadlifts, rack pulls, or block pulls.

I wrote a whole post on choosing the right deadlift for your body type if you want more options and information.

Mistake #2: Not setting the upper body correctly

I can predict if someone is going to round their lower back during the deadlift by how they position their upper back, shoulders, and arms during their setup. If you can get your upper body locked in, you greatly reduce the chance of your form breaking down as you start to pick up the bar.

First, you want to pull your shoulders back and down. Do not allow the shoulders to be rotated in toward your chest or elevated toward your ears. Think about keeping the chest tall and pulling your shoulder blades into your back pockets. If you had writing on your shirt, someone standing across the room should be able to read it throughout the entire lift.

IMG_8326

Incorrect: rounded upper back and internally rotated shoulders

Next, you want to get the muscles of your middle back firing. Think about squeezing an orange in your armpits. You should feel some activation running from you armpits down to the bottom of your rib cage. Keep the bar pulled close to your body (more on this below).

Finally, your arms should be completely locked out throughout the lift. Yanking the bar up with bent arms is a great way to aggravate the tendons of the shoulders and biceps. Instead, think about engaging the triceps as you would in the bottom of a tricep pressdown. This ensures your elbows are completely extended.

IMG_8327.jpg

Incorrect: unlocked arms

During the deadlift, the muscles of your upper body help by firing in this tight, immovable position. They should not be actively flexing or changing position. Once you have successfully followed these steps, your upper body should remain locked in this position throughout the lift.

Mistake #3: Letting the bar get away from you

The bar should should be held tight against your body throughout the entire deadlift. Keeping the bar close allows you to properly tap into the power of your legs and ensures that your spine doesn’t handle too much of the load. If you let the bar drift out in front of you, you greatly reduce your chances of completing the lift and increase the risk of injury.

IMG_8325

Incorrect: bar too far away from the body

When you set up, pull the bar in tight against your legs. This should happen somewhat automatically when you establish upper back tightness and proper shoulder position in your setup. Think of your body as a tight wedge and focus on squeezing your armpits against your sides. Maintain contact with your legs as you complete the lift and don’t allow the bar to drift out in front of you.

If you are someone whose hips shoot up at the top of your deadlift, bar position and upper back tightness are likely the culprits. If you can keep the bar pulled tight against your body as you initiate the lift, you will have more success moving your body as one unit. This was a huge game changer for my own deadlift.

If you are struggling to keep the bar close, try using the following drill. Attach one end of a band to the barbell and the other end to a power rack or some other immovable object in from of you. A strong partner can also assist you by holding the other end of the band. Now, try to complete the lift without letting the band pull the bar away from you. This teaches you to actively pull the bar into your body.

I’ve also found supersetting light sets of straight arms pulldowns in between sets of deadlifts helps clients activate the lats and learn what a tight position feels like. Focus on squeezing the armpits and holding the flexed position for one second.

I recommend wearing long socks, leggings, or pants on deadlift day. Dragging the bar up unprotected legs can lead to bruising or cuts on your shins. You never want to compromise form because you are worried about something cosmetic.

Mistake #4: Turning the deadlift into a squat

This tip is especially relevant for conventional and trap deadlifting since sumo deadlifts are inherently a bit more squat-like. When you set up for a conventional or trap bar deadlift, be careful not to dip your hips too low. Your deadlift should not look like a squat. In a squat, the torso is more vertical and the knees are out over the toes. In a hip hinge (deadlift), the torso should be more bent and the shins should be mostly vertical. This position is more advantageous for picking up a object from the floor as it allows you to properly tap into your posterior chain (back, hamstrings, and glutes). You will never be able to deadlift much weight if your deadlift is closer to a squat than a hinge.

IMG_8323

Incorrect: deadlift looks like a squat. Notice the very low hip position and more vertical torso angle

You may be making this mistake if you are constantly banging the bar into your knees. Spend some time drilling your hip hinge mechanics to learn how to properly reach back and load your posterior chain. If you can’t get into a good hinge with a conventional stance, switch to a sumo stance.

This video shows another drill you can use to improve the bar path during your deadlift by pushing back more from the hips.

Mistake #5: Hips too high at the start of the pull

Think of this mistake as the inverse of the previous tip. Some conventional and trap bar pullers set up with their hips so high that their torsos are parallel to the ground. This position reduces the power of the legs and places excess demand on the spine to complete the lift.

To fix this, set tension in the upper body and then sit the hips back slightly until you feel the point of peak tension in the hips and hamstrings. The strongest hip position is generally somewhere between this torso-parallel setup and the squat setup addressed in the previous tip.

IMG_8322

Incorrect: hips too high. You need to sit back slightly from this position to maximize recruitment of the legs. 

This mistake can also occur with sumo deadlifting. In the sumo position, always try to stay as vertical as possible. Think about dropping your hips directly over the bar rather than hinging them back behind you.

Mistake #6: Not using the glutes at lockout

The lockout, or finishing position of the deadlift, is crucially important for maximizing the effectiveness of the lift. The main force driving you into lockout at the top of the deadlift should be your glutes. I frequently see people leaning into the top of the deadlift, over exaggerating the lockout by pushing the hips forward and hyperextending their lower back. This is a dangerous position for the spine when under heavy loads.

Watch this video for a visual representation of what improper and proper lockouts look like:

I always recommend doing a warmup with a few glute activation drills before you deadlift. Sometimes I have clients perform additional sets of bodyweight or band glute bridges in between sets of deadlifts. If you want a big deadlift (or just a nice butt), it’s also a good idea to spend some time specifically building strength in the glutes. My favorite exercises for this are barbell hip thrusts, barbell glute bridges, 1-leg hip thrusts, Romanian deadlifts, 1-leg deadlifts, kettlebell swings, and back extensions.

Another lockout mistake is shrugging your shoulders and using your upper body to help you pull the bar up at the top. Earlier I discussed the importance of setting tension in the upper body and not allowing it to move at all throughout the lift. If you are a shrugger, record your lifts or have a partner watch you to keep you honest. Think about keeping the shoulders pulled into your back pockets and not allowing them to drift up toward your ears.

IMG_8324.jpg

Incorrect: shrugging at lockout

Smarter, Safer, Stronger

Deadlifts are a fantastic exercise that almost everyone should perform. However, it’s crucial to use good form in order to stay safe and make better gains.

The six most common deadlift mistakes are:

  1. Choosing the wrong deadlift variation for your body type. Sumo deadlifts, trap bar deadlifts, or elevated deadlifts may be a better choice than conventional deadlifts for many people.
  2. Not setting the upper body correctly. Prevent rounding of the lower back by starting with proper position of and tension in the upper back.
  3. Letting the bar get away from you. Keep the bar right against your legs throughout the entire lift.
  4. Turning the deadlift into a squat. Make sure you can hip hinge properly before attempting conventional deadlifts.
  5. Positioning the hips too high. Always sit back slightly to maximize recruitment of the legs.
  6. Not using the glutes at lockout. Squeeze your butt hard as you stand up but don’t push the hips so far forward that you arch your lower back. Never shrug at the top of the deadlift.

Want to get better at squatting and deadlifting? Download your free copy of my mini ebook, Squat and Deadlift School below.

I share my favorite form tips, troubleshoot common problems like the ones above, and provide progressions to help you work toward (or supplement) barbell training.

I’m confident both novice and experienced lifters can use the book and accompanying videos to take their training to the next level.

3 Strategies for Exercise on the Road

Training on the Road

I work in downtown Chicago, and many of my clients are busy professionals who frequently travel for work. One of the most common requests I get from these clients is to help them come up with effective workouts to complete on the road.

I have previously written about staying healthy while traveling. This post provides more specific detail on how to get in a good workout on the road regardless of whether or not you have access to a gym.

Invest in some equipment

If you travel frequently, I recommend investing a few small pieces of equipment to improve the quality of your workouts.

The first is a band or set of bands. Bands help you train muscles which are hard to target without weights, such as your back. They also allow you to add extra resistance to bodyweight exercises. Bands travel well because they are lightweight and take up very little room in a suitcase.

You can buy a set of bands with different levels of resistance; adding a door anchor increases the number of possible exercises even more. I recommend this set to my online clients who train at home. You can also buy single bands or packs of bands here, here, and here. Check out this video from ResistanceBandTraning.com for plenty of inspiration on band training:

Like bands, sliders help you target hard-to-train areas and make traditional bodyweight exercises like pushups and lunges more challenging. You can buy a fancy pair of fitness sliders here, but I’ve found regular furniture sliders from the hardware store work just as well on most floors. These usually cost $15 or less. Check out this video from low-tech training wiz Ross Enamit for some ideas on how to use sliders in your workouts:

Finally, get a jump rope. Jumping rope is a great way to get your heart rate up and work on your coordination. You can jump rope just about anywhere, making it the ideal training tool for the road warrior.

If your hotel has a gym with weights…

Some of you are lucky enough to stay at hotels with gyms. Nice hotel gyms sometimes have a set of dumbbells up to 50lbs, which means you can create a workout that resembles your gym workouts back home. However, for some people the dumbbells at the hotel gym won’t be heavy enough to provide a real challenge. The good news is there are ways to modify exercises to make lighter weights feel more demanding:

  • Slow down the eccentric portion of the lift. For example, if you are doing a goblet squat, sit down as slowly as you can. If you are doing a dumbbell row, lower the weight as slowly as you can.
  • Add in isometric pauses. Hold the flexed position of the exercise for 1-5 seconds. Try to squeeze working muscles as hard as you can and maintain tension throughout your body during the pause. For a squat, pause in the bottom. For a row, pause at the top. You can also add a pause in the stretched position of exercises such as curls, flyes, and rows.
  • Increase the volume. Lighter weights feel much more challenging when you perform more reps. If you’ve never tried performing sets of 20 rep squats, you are in for a real treat.
  • Group exercises together. This works especially well if you group exercises for the same body part. For example, you could perform a set of dumbbell flyes before your set of dumbbell bench press or a set of goblet squats before some walking lunges. These groupings will make each exercise feel more challenging so you won’t need to use as much weight to get a good training effect.

Read more: How to Train Hard at a Bare Bones Commercial Gym

Another way to make your workout more challenging is to add in some higher intensity cardio. Most hotel gyms have at least one piece of cardio equipment such as an elliptical, treadmill, or stationary bike. You can add cardio intervals to increase the conditioning demands of any workout. Hop on the equipment for 30-90 seconds at an all-out pace in between sets of strength exercises or at the end of a larger strength circuit. (Note – Please do not attempt treadmill sprints unless you are an experienced runner.)

Read more: Improve Your Conditioning with Finishers

If you don’t have access to a gym…

You can have a great workout in your hotel room without a single piece of equipment. Choose a handful of exercises from the following list:

  • Squats
  • Glute bridges and single-leg glute bridges
  • Jumps including squat jumps and jumping jacks
  • Single-leg exercises including lunges, split squats, and single-leg deadlifts
  • Pushups and advanced pushup variations including alligator pushups, dive bomber pushups, and clapping pushups
  • Core exercises including planks, side planks, other plank variations, mountain climbers, dead bugs, leg lowers, and russian twists
  • Crawling (if you have space)

Always consider your injury history and skill level when choosing exercises. For example, jump squats would be a poor choice for someone with knee pain but a good choice for a stronger trainee for whom bodyweight squats are fairly easy. In general, adding an explosive or jumping component to an exercise will make it more challenging. Jump squats, jumping lunges, and clapping pushups are good examples.

If you have purchased any of the equipment mentioned above, you can greatly expand your repertoire of hotel room exercises. Bands allow you train your back and arms. Sliders allow you to train your hamstrings using leg curls. Both pieces of equipment allow you to progress other exercises by adding some external resistance.

Putting it all together

Below are a few of my favorite travel workout templates. These example workouts can all be performed with minimal equipment in your hotel room, although you could easily modify them to include weights if you have access to a gym.

When creating your own workouts, try to be as balanced as possible. Each workout will ideally contain one exercise from each of the major movement patterns (squat, hinge, push, pull, 1-leg, core). Add in some conditioning using a jump rope or cardio equipment to make the workout more challenging.

Many of these examples were inspired by or taken from Jen Sinkler’s fantastic Lift Weights Faster product, which is a great resource for people who want to train with minimal equipment.

Circuit: Complete a set number of rounds (usually 3-5) as quickly as possible

Example: complete 3-5 rounds of the following:

  • 50 jump rope or jumping jacks
  • 20 mountain climbers each leg
  • 30 squats
  • 20 dead bugs (10 each side)
  • 10 push-ups

Density: Set a timer and complete as many rounds as possible before time runs out

Example: Complete as many rounds of the follow as possible in 20 minutes:

  • 10 reverse or jumping lunges each side
  • 15 band pull aparts
  • 20 glute bridges or 1-leg glute bridges
  • 15 push-ups
  • 10 dead bugs each side

Ladder: Complete an ascending or descending number of reps of each exercise.

Example: Complete the following ladder:

  • 10 squats or squat jumps
  • 10 superman
  • 10 reverse lunges each side
  • 10 pushups
  • 10 side lunges each side

Next round 9 reps, then 8 reps, etc. Or if you have less time you could do next round 8 reps, then 6 reps, etc.

Make the best of your situation

You don’t need a lot of equipment or time to have an effective workout on the road. Invest in a few small pieces of equipment or choose from a list of bodyweight exercises you enjoy. Use intervals, training tempo, increased volume, and exercise groups to increase the challenge of a workout. Set aside time each day to exercise while on the road and reap the benefits of more consistent training without constant disruption.

If you’re serious about getting in shape, you have to find time to work out. However, despite the best intentions, it’s difficult to train when you’re busy, stressed, or on the road. I created my 4C System course to help busy professionals overcome these obstacles and become more consistent with training. This totally free five-day email course takes you through the exact steps I use with my clients. Sign up below and you’ll get the first lesson right away.

Training Around Shoulder Pain, Part 2

Training Around Shoulder Pain, Part 2

In part 1, I explained why you may want to avoid certain exercises if you have an existing shoulder injury or are dealing with shoulder pain. I also discussed how to modify other exercises to prevent shoulder aggravation.

In this second part, I dive into the exercises you should focus on more to keep your shoulders feeling strong and healthy.

Prioritize horizontal pulling

One of the best ways to keep your shoulders feeling healthy is to train your back. However, as we discussed in part 1, vertical pulling can actually aggravate shoulder issues and may be totally out of the question for some.

Instead, focus on rows and other horizontal pulling exercises. These can be completed with a variety of implements. Some of my favorite rows include chest supported rows with dumbbells or machines, 1- and 2-arm bent over rows with barbells or dumbbells, inverted rows using a TRX or smith machine, and seated low rows using a cable machine.

Face pulls using bands, cables, or a TRX should also be a staple movement in all workout programs.

To ensure safety and effectiveness, follow a few key steps when completing any row variation:

  • Start with your arms fully extended out in front of you. Think about reaching ahead without allowing your shoulders to round forward.
  • Initiate the row with your elbow and only pull until your upper arms are even with your sides to avoid forward dipping of your shoulder.
  • Add a 1-second squeeze to the flexed position of all rows to maximize engagement of the back muscles and keep you honest with the weight.
  • Never allow your shoulders to shrug up toward your ears. Think about keeping your shoulder blades in your back pockets.

I have most clients perform 1-2 pulling exercises for every pressing exercise.

I recommend training rows with a variety of loading methods. Some rows, such as barbell bent over rows and pendlay rows, can be loaded quite heavy and performed for sets of lower reps. Others, such as machine rows and dumbbell bent over rows, work well with both higher and lower rep schemes. For best results, train your back using as many set and rep schemes as you can.

Include reaching movements

Many times, shoulder pain can occur because the shoulder is not able to move through a complete range of motion. When you place your restricted shoulder under heavy loads, such as in an overhead press, bad things can happen. In healthy individuals, the shoulder blade should be able to move up and around the rib cage without restriction.

To visualize this, first extend your arm out in front of your chest. Now, imagine someone is holding a $100 bill just beyond your fingertips. If you think about reaching for the bill, you will find that your shoulder blade pushes out to the side and provides your arm with a few extra inches of range that you didn’t have before. This is known as reaching and is an important part of full shoulder mobility.

In part 1, we discussed packing the shoulder blades to safely perform bench press variations. For most other pressing exercises, however, we want the shoulder blades to move during the lift. Incorporating reaching exercises in your program is a crucial part of maintaining healthy shoulders.

Landmine pressing

If you have cranky shoulders but still want to do some pressing, the landmine is going to become your new best friend. The landmine is a gym tool that attaches one end of a barbell to the floor and allows the barbell to rotate and move freely at an angle. Landmine pressing provides many of the same benefits of regular overhead pressing without placing your shoulder in an unsafe or painful position.

Follow these steps for a great landmine press:

  • Begin with your hand at the end of the barbell and your elbow at an angle slightly less than 90 degrees.
  • As you exhale, push the bar up until your arm is fully extended.
  • At the top of the movement you should be reaching as far as you can without allowing the shoulder to shrug up.
  • Always keep your elbow beneath the bar as you press.

Landmine pressing can be performed in half-kneeling, tall-kneeling, standing, and staggered positions. I recommend starting in the half-kneeling position to help you engage your core and resist arching your lower back.

Push-ups

Although they are a horizontal press much like a bench press, push-ups require you to move your shoulder blades throughout the movement rather than keeping them packed together.

Follow these steps for a great pushup:

  • As you lower your body toward the ground, the shoulder blades should move back together toward your spine.
  • At the top of the pushup, reach your arms into the floor and pull your shoulder blades apart as far as you can.
  • Always resist the urge to shrug your shoulders and keep them down away from your ears throughout the exercise.
  • Keep your elbows at around a 45 degree angle of your sides as you descend.

The bear and bear crawling

A third way to incorporate reaching movements in your training is to use bear variations.

Get into a bear position by starting on all fours (hands beneath the shoulders, knees beneath the hips, and a flat back). Reach your arms into the ground as far as you can, raise your knees a couple inches off the floor, and get up on your toes. Beginners can practice holding tension in this position, much like a plank, for a fantastic core exercise.

Make this more challenging by slowly crawling forward or backward with alternating pairs of opposite arms and legs. Always try to reach down through the floor and maintain your flat back as you crawl.

Shoulder raise variations

If your goal is hypertrophy, you can still put on size without hurting your shoulder. Depending on the nature of your shoulder issue, you may be able to complete light shoulder raise variations without pain.

Always lead with your thumbs rather than your pinky on front and lateral raises to keep the shoulder out of internal rotation. Never use heavy weights on these exercises. Use a weight you can lift for 10-20 reps at a slow tempo with perfect form.

You should also spend lots of time training the rear head of the deltoid with different reverse flye variations. Even in healthy lifters, the rear delt is one of the most neglected muscles. Putting on some size here helps give your shoulders a round, 3D look. If you don’t tolerate lateral or front raises, you should still be able to hit this part of the shoulder.

Some of my favorite exercises for this muscle are bent over rear delt flyes, seated rear delt flyes, prone reverse delt flyes on a bench, and reverse pec dec. You also train these muscles with face pull and band pull apart variations. As easy way to get more volume for the rear delts is to add a set of 10 band pull aparts between sets of all your other exercises. Work up to 100 band pull aparts during each workout.

Don’t let a shoulder injury slow you down

You can still have a great workout while dealing with cranky shoulders. Be smart about which exercises you choose to include in your program. Avoid the overhead position and ensure that your shoulders are moving properly for each pressing exercise you perform. Do as many different row variations as you can and include some extra volume for the rear delts.

If you need help putting together a program that helps you reach your goals without pain, please contact me here.

Training Around Shoulder Pain, Part 1

Training Around Shoulder Pain, Part 1

Shoulder pain is one of the most common complaints I hear from clients. Old sports injuries, bad lifting habits, and terrible desk posture combine to create a perfect storm of tight and achey shoulders.

Thankfully, there are ways to exercise without further jacking up your shoulders. Redesigning your approach to training may even help you improve your posture and reduce pain in your life beyond the gym.

This two-part blog post explores how to train around shoulder pain. Part 1 shares which exercises to avoid and which to modify so they are more shoulder-friendly. Part 2 explains which exercises and training techniques you should prioritize to help you build strength and stability and keep your shoulders feeling good.

*Please note, if you are experiencing muscle or joint pain I always recommend seeing a physician or physical therapist. A personal trainer is not qualified to diagnose medical conditions or prescribe treatment and exercise is not a substitute for medical care.  This is not intended to be a comprehensive list of shoulder solutions, but rather a few things that I have repeatedly found helpful with my clients.

Be Wary of Overhead Movements

If an exercise causes you pain you should stop doing it.

I can’t tell you how many times I’ve met with a new client who has an existing shoulder injury but tells me that they regularly perform heavy overhead pressing movements.

If you are dealing with any kind of shoulder pain, you should remove direct overhead movements from your program for at least a short period of time.

Overhead Pressing

Barbell overhead pressing poses the more risk to shoulder health than any other exercise.

In order to properly perform this movement you need full shoulder flexion (the ability to get your arms overhead), the ability to extend through your thoracic spine (mid-back), and core stability to prevent lower back hyperextension (arching).

If any of these pieces is missing, you run the risk of hurting your shoulder. This risk combined with the heavier loads people often force on these exercises (hello, ego) make this lift a poor choice for almost everyone.

Depending on the nature of your shoulder issue, you may be able to tolerate lighter overhead pressing using dumbbells or kettlebells in the scapular plane. This means that you keep your arms somewhat in front of your torso rather than out to the side in what I call the “high-five” position. Try single-arm pressing from the half-kneeling position to prevent you from arching your lower back.

high 5 vs scap plane.jpg

High-five position on the left, scapular plane on the right

If you need to remove overhead pressing permanently, fear not. There are other exercises and tools you can use to get many of the same benefits without the pain or risk. I will dive into these options more in part 2.

Vertical pulling

You also need to be cautious with vertical pulling movements. If you can’t overhead press without pain, you don’t have any business performing chin ups or pull ups.

Lat pulldowns are one of the most commonly butchered exercise at the gym. If you want to try including lat pulldowns in your workouts, start with lighter weights and use an attachment that feels comfortable. Always pull your shoulder blades down before initiating each rep. Remove these if you experience any pain or discomfort.

Some people with shoulder issues are able to get into a semi-overhead position using dumbbell or kettlebell pullovers. This movement is completed by lying on a bench and slowly lowering a weight behind your head, creating a big stretch on the lats.

Become a Better Bencher

Since overhead pressing is likely out, most of your pressing work will be done in the horizontal plane. The bench press and its many variations are staple movements in this plane. In order to perform these exercises pain-free and ensure you aren’t putting your shoulders at risk, you need to learn a crucial technique known as packing your shoulders 

To pack your shoulders, start with your arms extended above your chest in push-up position. Simultaneously pull your shoulder blades down away from your ears and together towards your spine. This creates a “shelf” with your upper back on the bench and naturally pulls your lower back into a slight arch.

You must maintain this packed position for the entirety of the set. Don’t lower the weight so far that front part of the shoulder dips forward. When you complete each rep, focus on locking out with your elbows rather than reaching your arms farther above you which causes the shoulder blades to pull apart.

It’s also important to make sure your elbows track properly during the bench press. Rather than lowering your arms to 90 degree angles with your sides, try to keep them within a 45 degree angle. Keep your palms facing slightly in throughout the exercise to help facilitate this movement. You should look like an arrow rather than a “T” when viewed from the top.

Read more: 6 common bench press mistakes

Bad shoulder positions can creep up where you least expect them

Many exercises in the gym can stress the shoulders without directly training them. One exercise that often bothers people with cranky shoulders is barbell back squatting. Because of the position of the arms and shoulders when supporting the bar on your back, this exercise can cause a lot of discomfort.

First, try moving your hands wider on the bar. This works best if you are able to use a lower bar position on your back. If that still causes problems, remove barbell back squats entirely and use a safety squat bar or front-loaded squat variations instead.

Read more: Can’t back squat? Try these front-loaded squats instead

In part 2, I explain why rows and other horizontal pulling motions are great for helping your shoulders feel good. However, bad rowing technique can also irritate your shoulders. A row should always be initiated from your shoulder blade rather than your shoulder joint.

Instead, pull your shoulder blade back towards your spine. Think about leading with the elbow and stop the row when your upper arm is even with your torso. Rowing back in a slight arc towards your hip can also help you keep your shoulder in a safe position and ensure that the row is properly targeting your back.

I also recommend a 1-second pause in the flexed position of rows to prevent you from yanking your shoulder and to keep you honest with the weight.

Be Smart

If you are dealing with a shoulder issue, first remove any exercise that causes pain. Most people with cranky shoulders will do best by removing all overhead pressing and pulling from their workouts. In time, if your issue is minor, you may be able to re-introduce light overhead work with dumbbells and kettlebells.

Be sure to pack your shoulders and keep your elbows tucked towards your sides during bench press variations.

Watch your shoulder position throughout your workouts, as you may experience pain on unrelated exercises such as barbell back squats.

Check out part 2 where I discuss what exercises you should prioritize to keep your shoulders healthy and avoid pain during training.

3 Reasons Women Should Lift Weights That Have Nothing to Do With Looks

I first started seriously lifting weights a few months before my 20th birthday. Although I had previously dabbled in the weight room, I mostly just wandered from machine to machine. My primary motivation for lifting was to lose fat. I had just started the initial phase of my fat loss journey and I had a vague idea that strength training should be part of a well-rounded exercise program. But I never really felt like I knew what I was doing and I certainly didn’t push myself very hard.

In December 2011, I read an article from Nia Shanks about the benefits of heavy lifting for women that truly sparked my curiosity. I began spending much of my free time researching the basics of strength training. I started spending more time in the gym and put in much more focus and hard work. Over the course of several months, my strength increased dramatically. Suddenly, a formerly overweight young woman who had always hated fitness testing in PE class was deadlifting 300lbs and completing unassisted chin-ups for the first time. This experience was one of the most important things to ever happen to me. Not only did it eventually lead to a rewarding career, it changed who I was and how I viewed myself in fundamental ways.

In honor of National Women’s Health and Fitness Day, I want to share three of the most powerful but often overlooked benefits of strength training for women. These benefits can certainly apply to men as well. However, I’ve found that regular strength training helps women in particular rise above a world that teaches them that small is best and that they need others to help them make decisions or care for themselves.

Woman Using Talk Before Intense Training

Being strong makes everything else easier.

Physical strength is the most basic athletic adaptation. Just by getting stronger, you can jump higher, throw farther, run faster, and improve your endurance (note – this becomes less true as you become an advanced lifter or athlete, but most recreational lifters never reach this level). A strong woman will have a much easier time getting through life than a woman who has never done any kind of resistance training.

Many women are engaged in a variety of physical tasks, activities, and hobbies on a daily basis. Some of us practice yoga, others are runners or cyclists, and still others participate in recreational sports such as basketball, ultimate frisbee, softball, or volleyball. If you get stronger, you will perform better and likely get more enjoyment out of all of these activities. A smart strength training routine can also help prevent injuries in these other pursuits.

If you are a mom or plan to be one someday, getting strong is one of the best things you can do for yourself and your children. Any new mom will tell you they spend many hours of the day lifting, carrying, and holding their kids. They have to lug around diaper bags, toys, and other necessities. Building a base of strength will make all of these tasks much less taxing on your already stressed body.

Finally, having a foundation of strength makes it much easier to try new activities without fear. I recently went to a beginner class in circus acrobatics that had me hanging from a trapeze and the huge suspended ring known as the lyra. Although I had no prior experience, I was able to jump into beginner poses and flows with relative ease because I have spent many years building a strong back, grip, and hips. In the past, my weight lifting also helped me thrive on a strenuous backpacking trip without any prior experience. You never know what doors may be unlocked for you because your body was ready to take on a new challenge.

Screen Shot 2017-09-27 at 11.05.54 AM.png

Strength creates independence.

Most of us are familiar with financial independence (aka moving out of Mom and Dad’s house), but I would guess fewer people consider the value of physical independence. Physical independence means being able to handle all of your regular physical tasks without relying on another person. These tasks could include carrying groceries, walking a bigger dog (or carrying a little dog), carrying a suitcase and placing it into an overhead compartment, and getting yourself to and from work.

Our society teaches women that we are naturally weaker than men and need men to help with certain physical tasks. As a college music student, I remember professors always specified that they needed “strong guys” to help them roll pianos across the floor or move percussion equipment. This idea is pervasive throughout our culture. The reality is that women can build an impressive amount of relative strength at any size. You can certainly build enough strength to handle all of your daily tasks on your own. Getting in the weight room and regularly picking up heavy things helps provide you with the independence to travel, work, and live without regularly requiring physical assistance from others.

Physical independence declines as you age. Lifting weights can help slow or reverse this process. One of the biggest physiological benefits of strength training is improved bone density, which can directly combat osteoporosis. Strength training when you are younger helps ensure that you can live a full and active life without physical assistance as you age.

Another way that strength training builds independence is by teaching you to listen to your own body and make decisions that are best for you. As you become a more experienced lifter, you become more in touch with your your body’s needs and ability to adapt to stress. Although I always recommend working with a qualified coach, especially if you are new to lifting, in time you should seek to develop some level of autonomy with your training. You no longer need someone to tell you what to do all the time because you have built a foundation of knowledge and experience unique to your situation. This translates to many other areas of your life.

Building strength helps you feel confident and empowered.

The most powerful benefit I experienced after I made strength training a regular part of my life was a profound feeling of empowerment. As an overweight, extremely self-conscious teengager, I was always apologizing for the way I looked and trying to take up less space. Seeing the incredible things I was now able to do changed all of this. After many years of feeling awful about the way I looked, I suddenly had a new lens through which to view my body. I stopped caring solely about the way I looked and started paying more attention to what I could do. My body was no longer the enemy; it was now the vehicle for which I could challenge myself, have fun, and move powerfully through the world. I felt like a badass in the gym and this newfound feeling of confidence spread throughout my life.

Physical strength also helps you develop mental and emotional strength. Because I have pushed through challenges in the gym, I know I can endure trials in my personal and professional life. Strength training tests your limits and lets you see what you are truly capable of in a way that is healthy and enjoyable. Setting, pursuing, and achieving goals in the gym grows your self-confidence. In short, your growth in the weight room serves as a vehicle for personal and professional growth outside of the gym.

Fit-african-woman-with-dumbbells

Train to be more, not less.

These days, most people know that strength training can transform your body in impressive ways. For me, however, the most important and enduring benefit is the confidence that I can handle anything life throws at me.

Looking for a strength training program geared toward beginner and intermediate lifters? Check out Full45. I created this program to help you build strength and confidence in the weight room without fancy equipment or long workouts.